Alternative Photographic Techniques – Platinum and Palladium Printing

I have been interested in alternative photography and their associated historic printing techniques for a few years now. The process itself coupled with the tonality, delicacy and unique nature of each print appeals to me. When a course became available at West Dean College, an arts and conservation college close to where I live, I immediately reserved a place. The course took place last week and this is my report. Whilst this is a fairly long entry with a lot of illustrative pictures, if you are at all interested in this alternative photographic process specifically platinum and palladium, the aristocrat of contact printing, then I hope you will read on.
The course tutor was Dr Peter Moseley. It quickly became very clear that he had expansive knowledge of all the various printing options available. His own specialty is copperplate photogravure and a number of large prints of his own work where on display in the college. Wonderful images but photogravure is a very different process to the one we would be practicing on the course. Peter is an excellent teacher, clearly explaining the process coupled with a rather quiet and endearing sense of humour.
By way of a brief explanation alternative photography is not conducted in a darkroom. The process involves taking a sheet of paper, which is then coated with a light sensitive chemical solution. The coating can be applied with a variety of brushes, or a glass tube which is known as a puddle pusher. Once evenly coated the paper is allowed to dry in a lightproof box or drawer. The drying process can be aided by using a hairdryer on a gentle heat setting. A negative is then placed emulsion side down onto the coated paper and placed in a light-box where it is exposed to UV light for a determined period of time. The exact exposure time will depend on the chemical solutions being used, how thickly the coating has been applied, the paper type, humidity and the light source itself. We did some initial cyanotype prints and they took about 15 minutes to expose, whereas the platinum and palladium prints where exposed for about 8 minutes. I will refer back to exposure time later in the post.
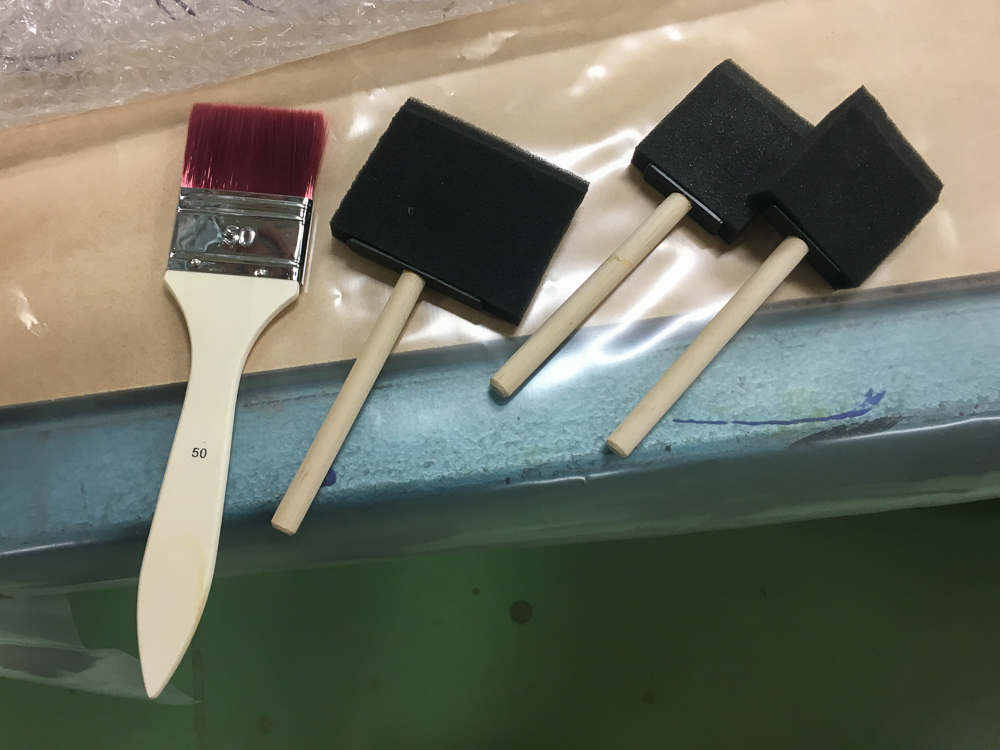
A variety of foam and man made brushes used for coating the paper.
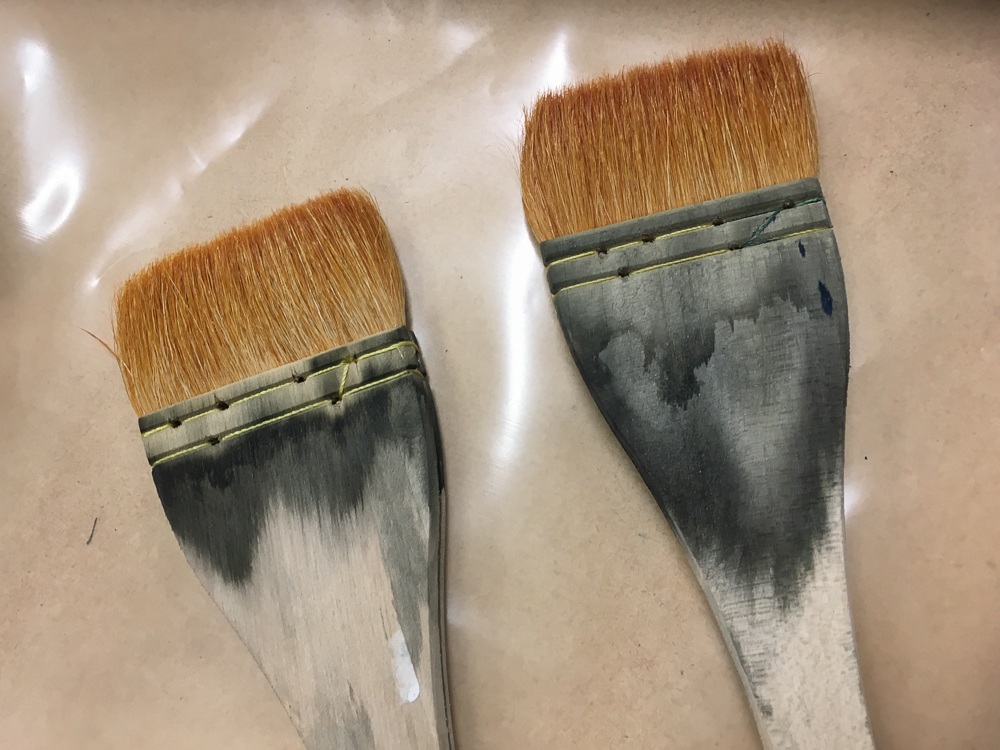
Hake brushes – these do not have a metal ferrel which might corrode and leach into the brush hairs.
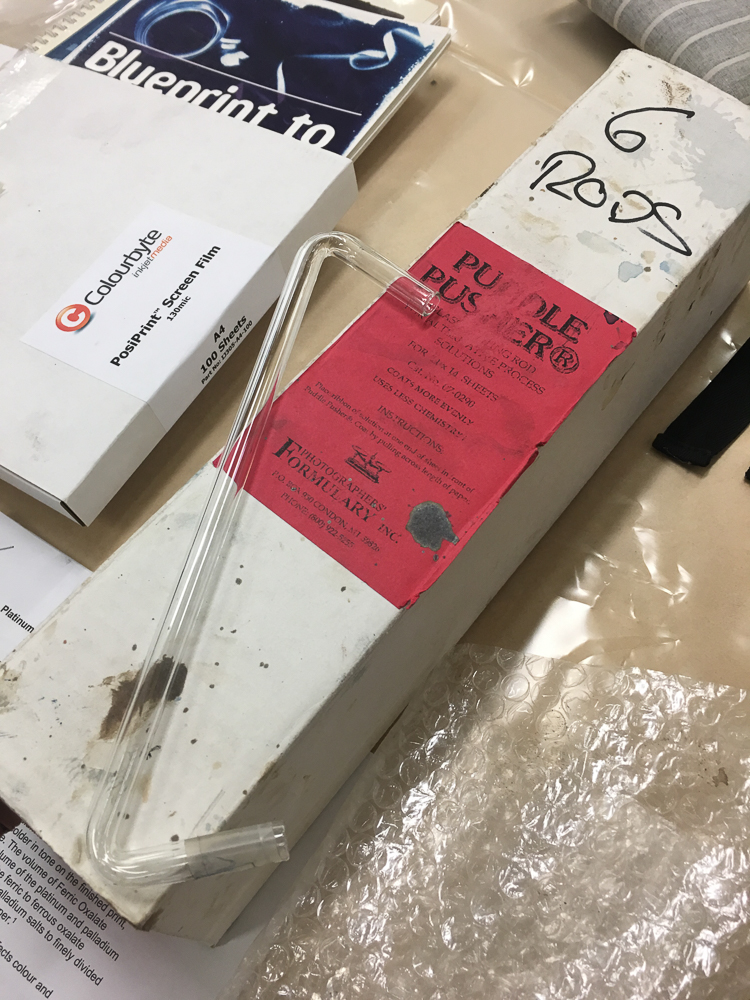
A box of puddle pushers or glass rods which are used in conjunction with a syringe to spread the chemical solution.
Applying the coating with a glass rod.
Once exposed the negative is removed and the photographic print is placed in a developer, followed by washing in clearing baths and a final rinse under water. The chemical solutions used in these baths and the time the print is washed in each one varies according to the print process. The print is then hung to dry naturally, usually overnight. The printing process is therefore quite straight forward but I was soon to find out it was much more complex to achieve the best possible print.

Dr Peter Moseley and the light-box used to expose the prints.The lid has a vacuum seal to hold the paper and negative flat against the glass surface.
For an A5 size platinum and palladium print we used a mixture of three solutions. Potassium Chloroplatinate (20% w/v i.e. 20gms to 100ml of water), Sodium Tetrachrolopalldite (15% w/v) and Ferric Oxalate (27% w/v). An eye dropper was used to mix the solution in a small plastic cup. Platinum gives a cooler tone and is very expensive, whereas palladium gives a warmer tone and is by comparison better value but is still far from cheap to buy. The balance between these two chemical solutions is down to the photographer or printmaker, but the total number of drops of each solution should be matched by an equal number of drops of Ferric Oxcalate. We used 3 drops of Potassium, 7 of Palladium and 10 of Ferric Oxcalate. We also added 1 drop of tween which reduces surface tension and makes it easier to apply the coating. These chemicals are very expensive and not readily available, particularly in the UK. These solutions were sourced as a kit from Bostick and Sullivan in the USA. I should just add that protective gloves, goggles and a mask were worn when handling these solutions.
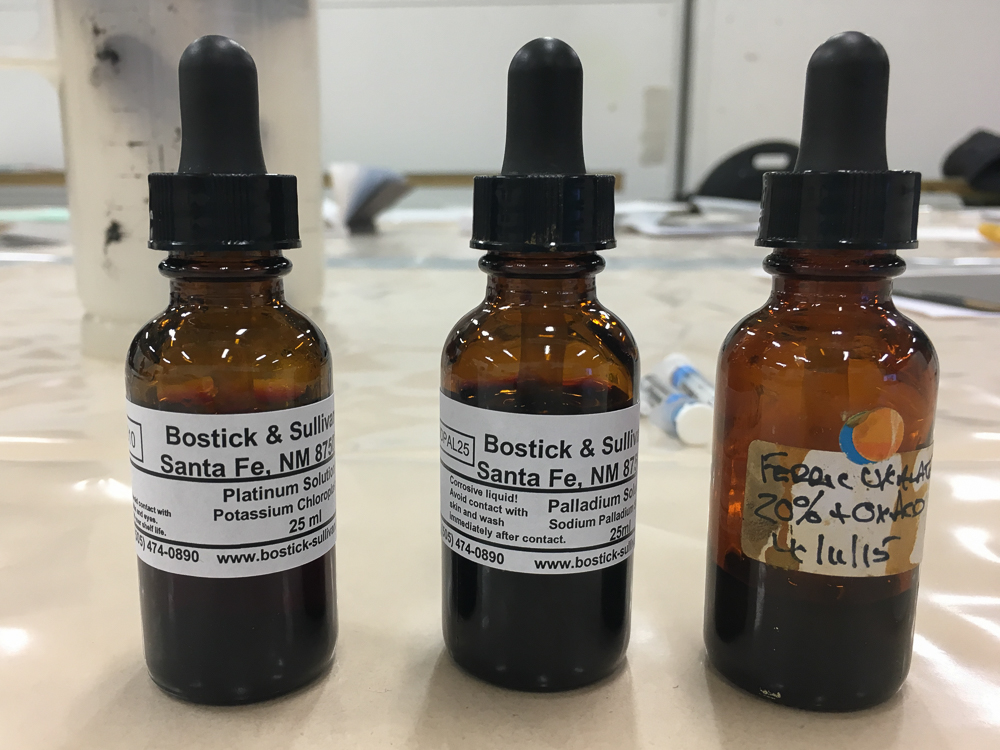
A platinum and palladium kit supplied by Bostick and Sullivan in America
The developer solution used on the course was Ammonium Citrate (20%w/v) but Potassium Oxcalate (25%w/v) can also be used. The former is reputed to be less hazardous whilst the latter gives a warmer tone. We used three clearing baths – the first bath was 1% Hydrochloric Acid and for the second and third bath – EDTA (Ethylenediamine tetra-acteticacid) at 80gms per litre plus a small amount of Sodium Sulphite. The print was washed in the developer for just a few minutes before being transferred to the first clearing bath for 10 minutes. It was then washed under water before being transfrred to the other two baths for 10 minutes in each bath. The final rinse was done in a water bath for at least 30 minutes.
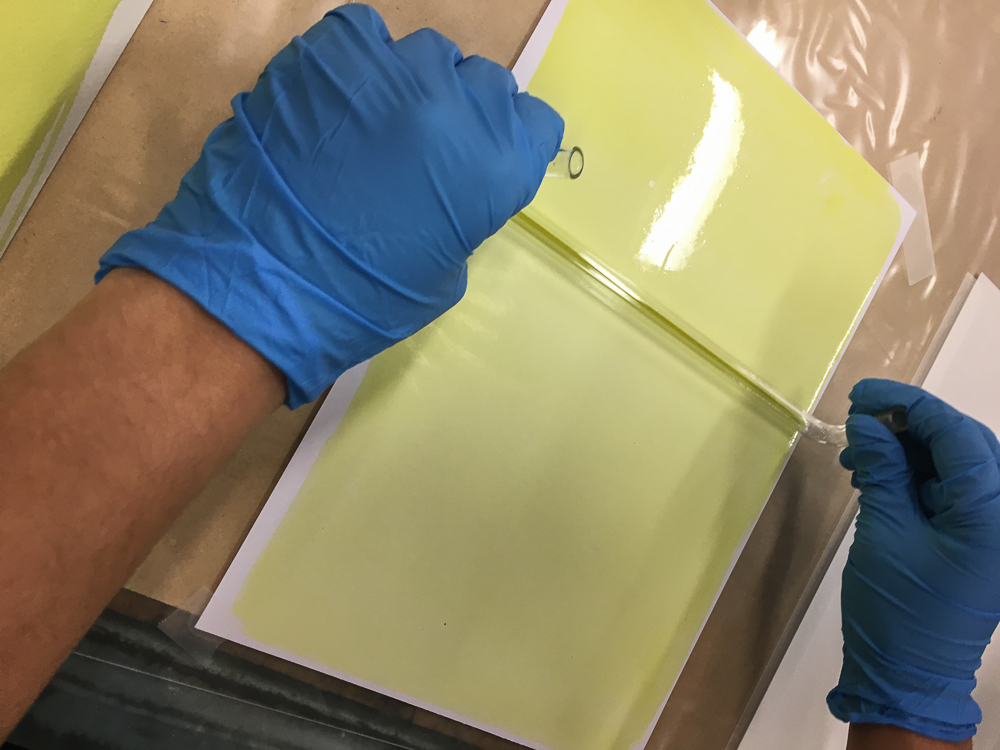
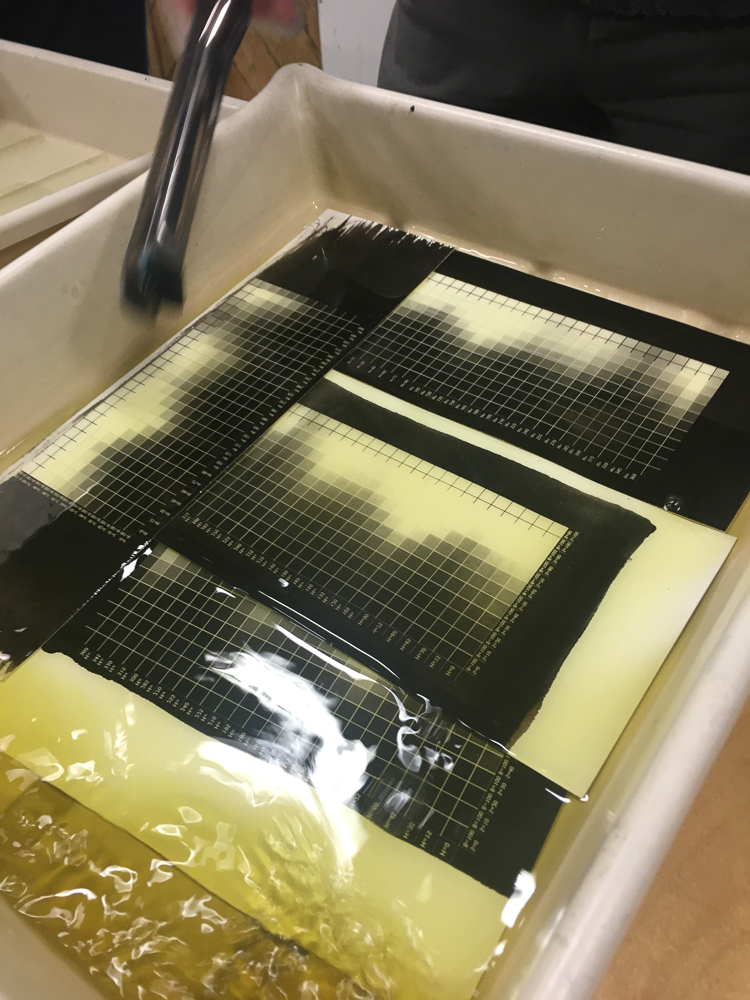
The print when placed in the developer solution leaves a yellow cast of residual iron salts.
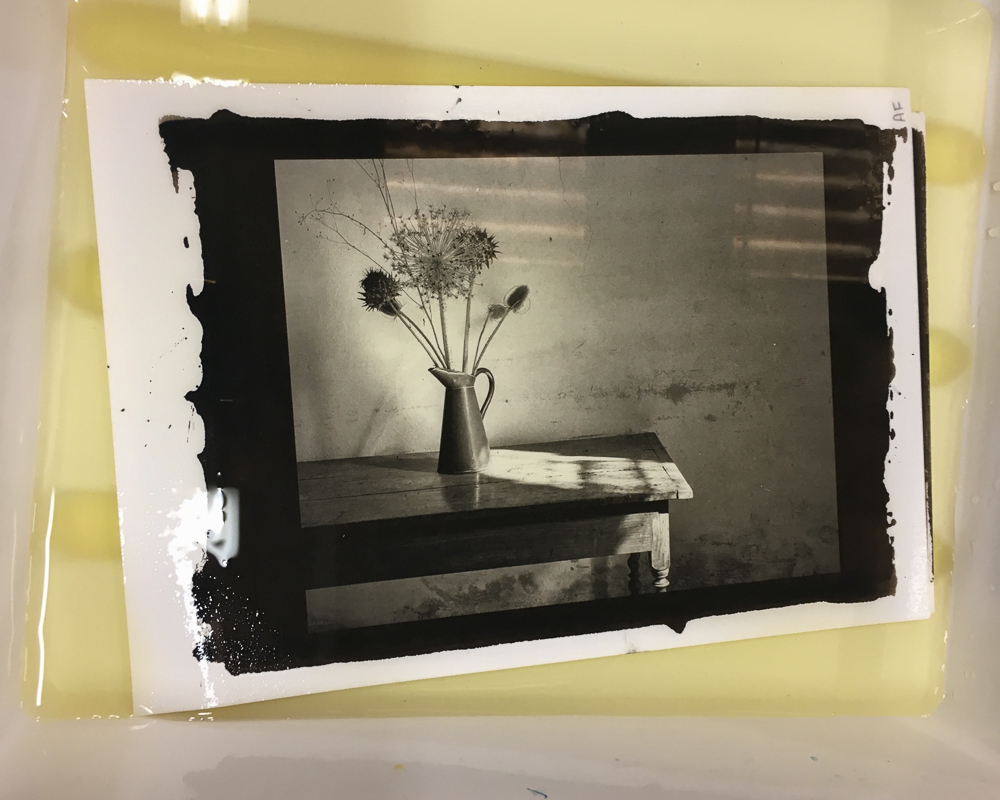
Once placed in the clearing baths the yellow cast is removed by a gentle washing action.
As mentioned earlier the actual printing process is relatively straightforward but in order to produce the best possible print a ‘correct’ negative needs to be made and the exposure time evaluated. You can of course use a film negative from a large format field camera – either 5 x 4 or better still a 10 x 8.
However a more convenient way in this digital age is to make the negative by using an image taken on a digital camera. This is then processed in Photoshop, to make an inverted version which is then printed onto a special acetate or transparency substrate using a digital inkjet printer. We used Colourbyte Posiprint Screen Film 130mic, but there are many other makes available with varying degrees of opacity. The size of the printed negative will dictate the size of the final print. This method obviously has the advantage that you can make the finished print as large or as small as you like. Unlike darkroom printing an enlarger is not used or required.
The ‘digital’ negative on a transparency substrate, processed in Photoshop and printed using an inkjet printer.
The process of making a correctly calibrated negative is really the key to making a good platinum and palladium print, or any other form of contact print for that matter. Once a workflow has been established for a certain type of print (platinum, cyanoptye, salt print) it shouldn’t in theory need to be done again – the technique can simply be replicated each time. This only works though if the choice of paper, transparency substrate, chemical solutions, light source for the exposure, humidity etc remain constant. Change any one of these variables and a new negative would have to be made.
The principle aim in creating a good digital inkjet print is to ensure that the final print has an even and continuous tone from maximum black to pure paper white. This is achieved by using a number of processes. First and foremost the minimum print exposure time needs to be established to secure the maximum black in the print. This is done to avoid over exposure whereby the shadow areas will start to block up if the exposure time is too long. Secondly the maximum density or opacity of the inkjet negative needs to be determined to ensure the highlights in the print are or close to paper white. Reduced opacity will result in muddy highlights. Finally there needs to be an adjustment to the tones of the negative so that when printed they show an even and full range. This is achieved by applying a ‘curves adjustment’ layer in Photoshop.
These three steps are critical to the whole printing process and are achieved using a stepwedge, a digital colour matrix and a script in Photoshop called ChartThrob, which can be downloaded from the web. I don’t intend going through each of these steps in detail, after all the course lasted four days but I will show some images below which illustrate some of the processes involved.
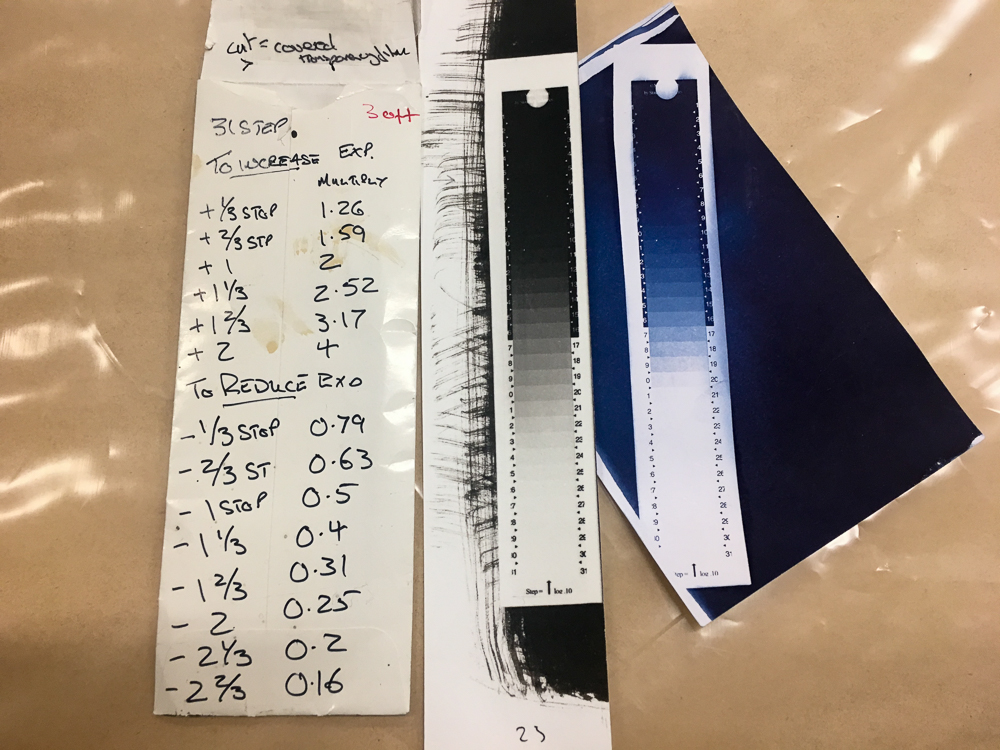
The results of printing a digital stepwedge – the left hand one of the pair is platinum and palladium and the right hand one a cyanoptype. The results are used to calculate the correct exposure time.
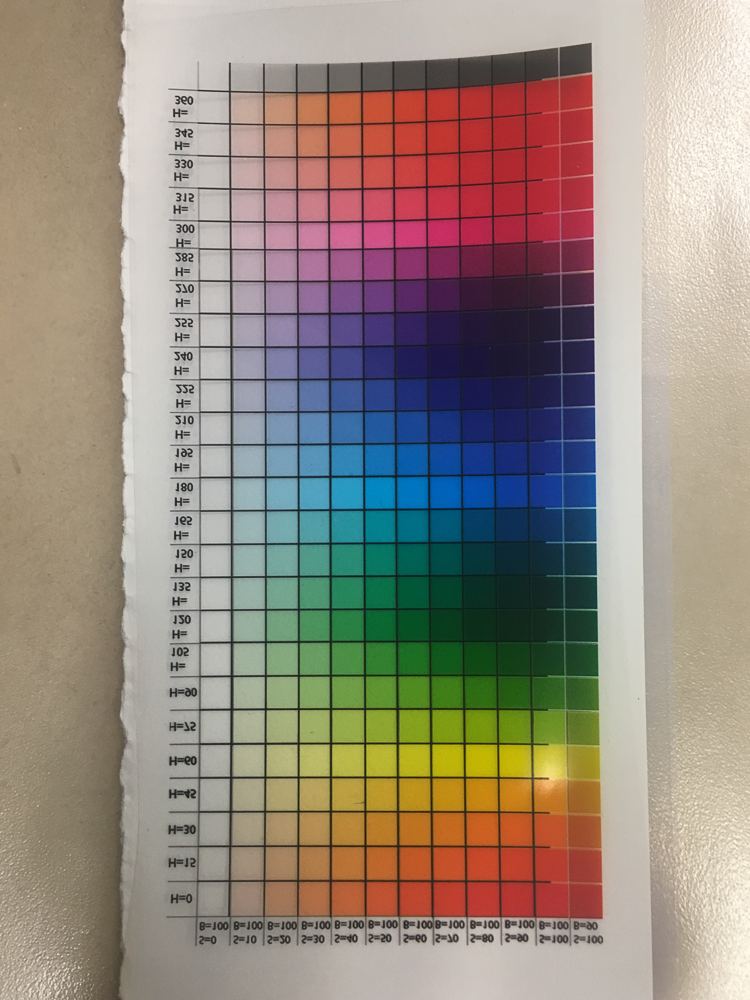
A digitally printed colour matrix negative.
The colour matrix printed onto the paper type of choice and placed in the developer solution. This is used to establish whether or not a colour hue is applied to the negative.
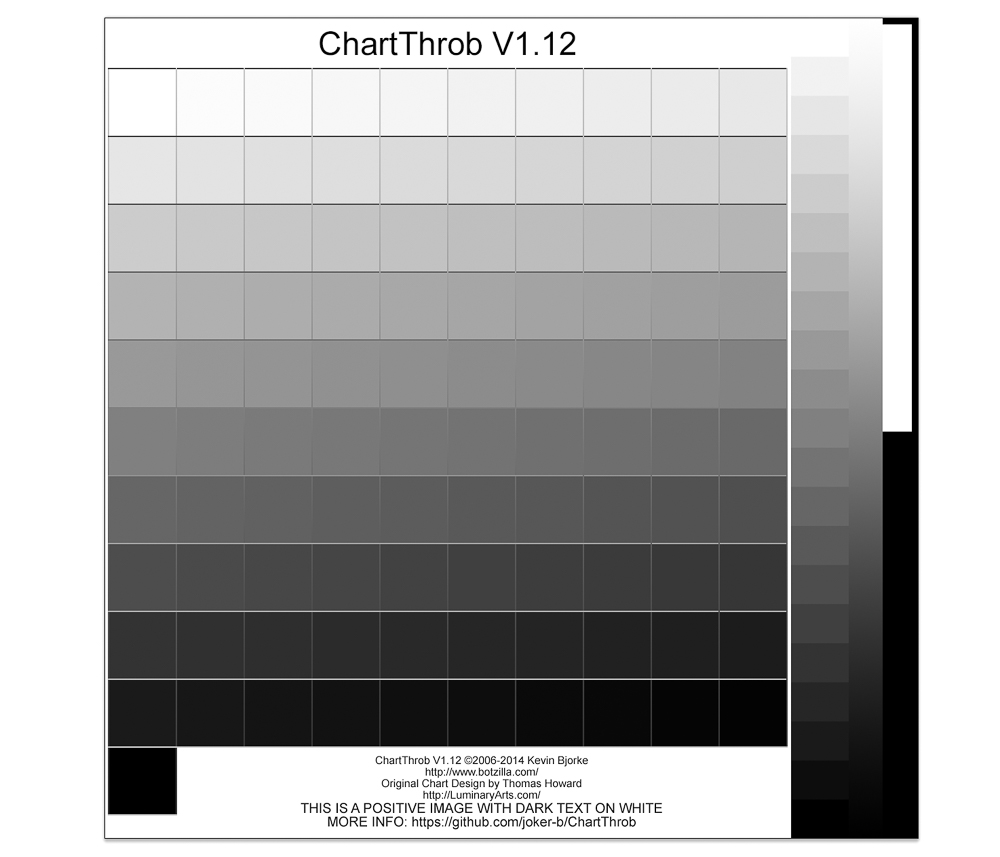
A screen grab of the ChartThrob chart created in Photoshop. This is printed onto the coated paper (see next image below), scanned and imported into Photoshop.
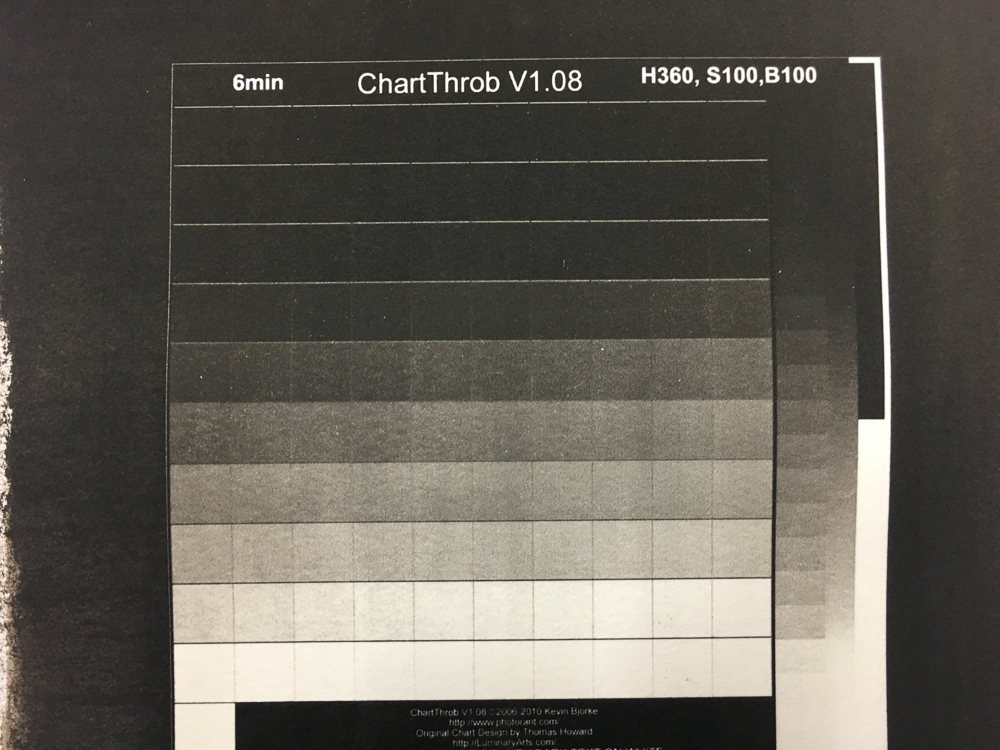
The printed version of the ChartThrob chart which is then analysed by the ChartThrob Script in Photoshop to provide a Curves Adjustment Layer. This layer is then used to produce a correctly calibrated negative.
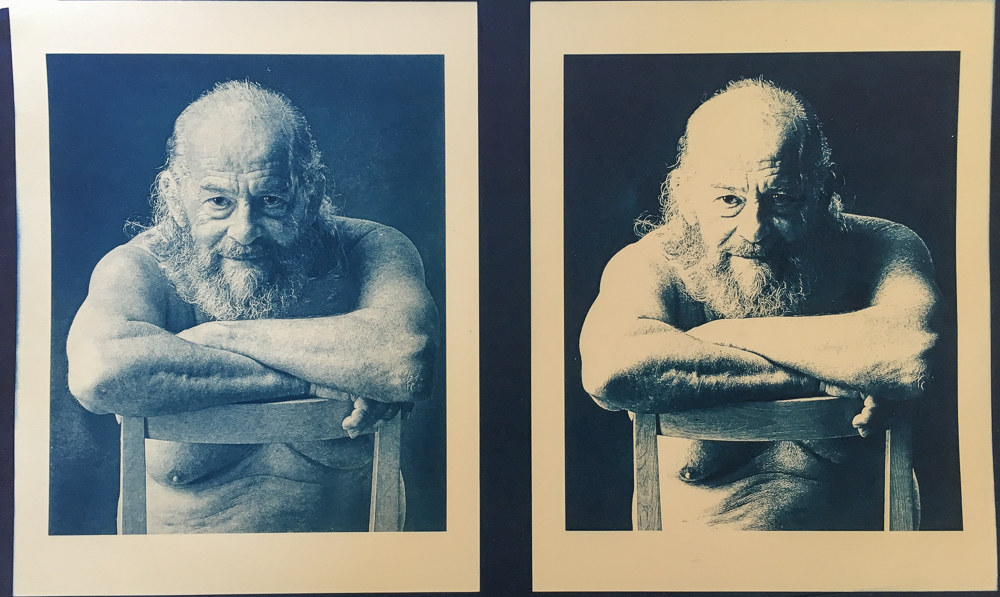
A cyanotype print. On the right the original negative has produced a binary print with no mid tones. On the left the print from a calibrated negative having applied the appropriate curves adjustment layer. The mid tones are now visible but a longer exposure time was probably required. (Negative by Peter Moseley)
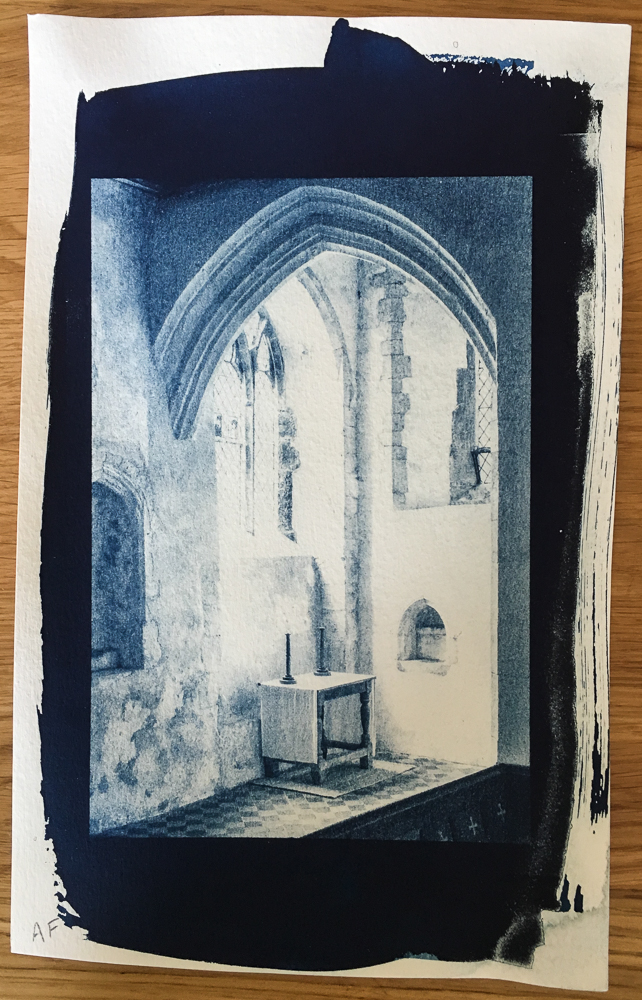
A cyanotyope of one of my images. An experiment as the negative had been prepared for a Platinum and Palladium print, not a Cyanotype, so the curves adjustment layer was not correct for a print of this nature.
These processes are in fact easier in practice than I have found them to describe but I hope it has given you an insight into some of the methods used to make an alternative photographic print.
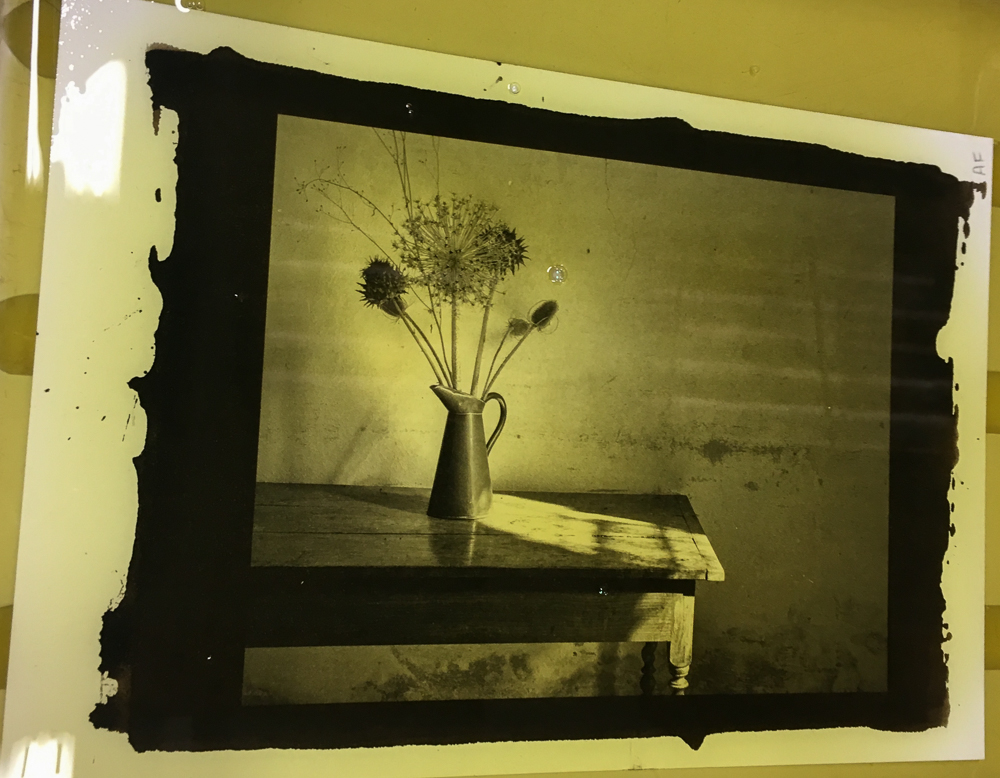
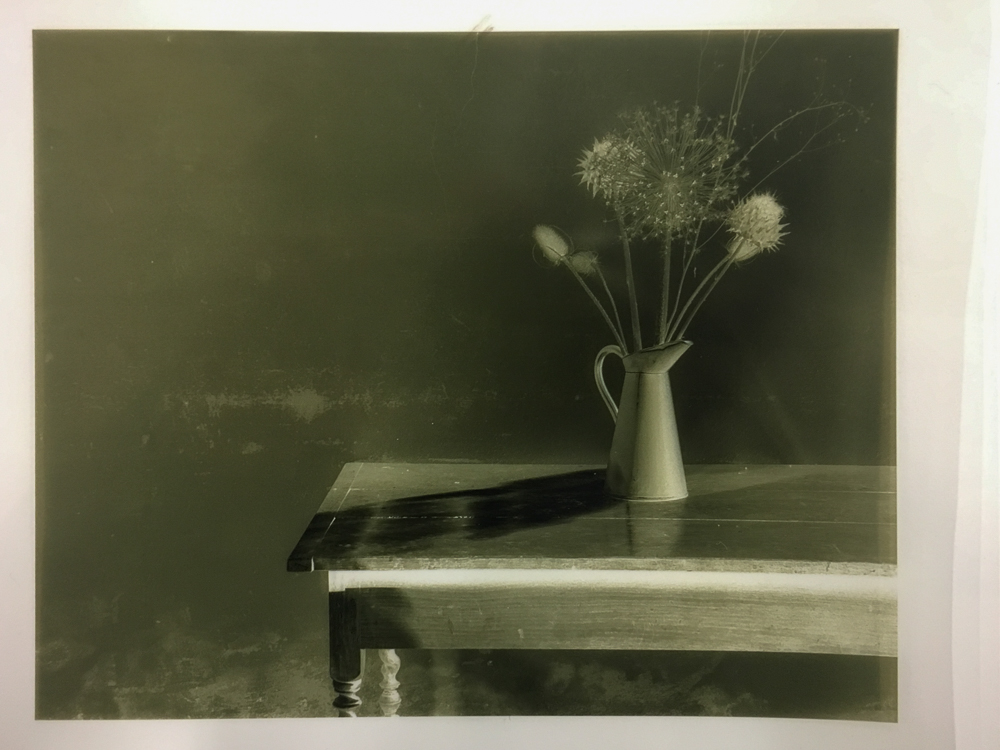
I am most pleased with the print which I have photographed and show below. A platinum and palladium print using one my own pictures.
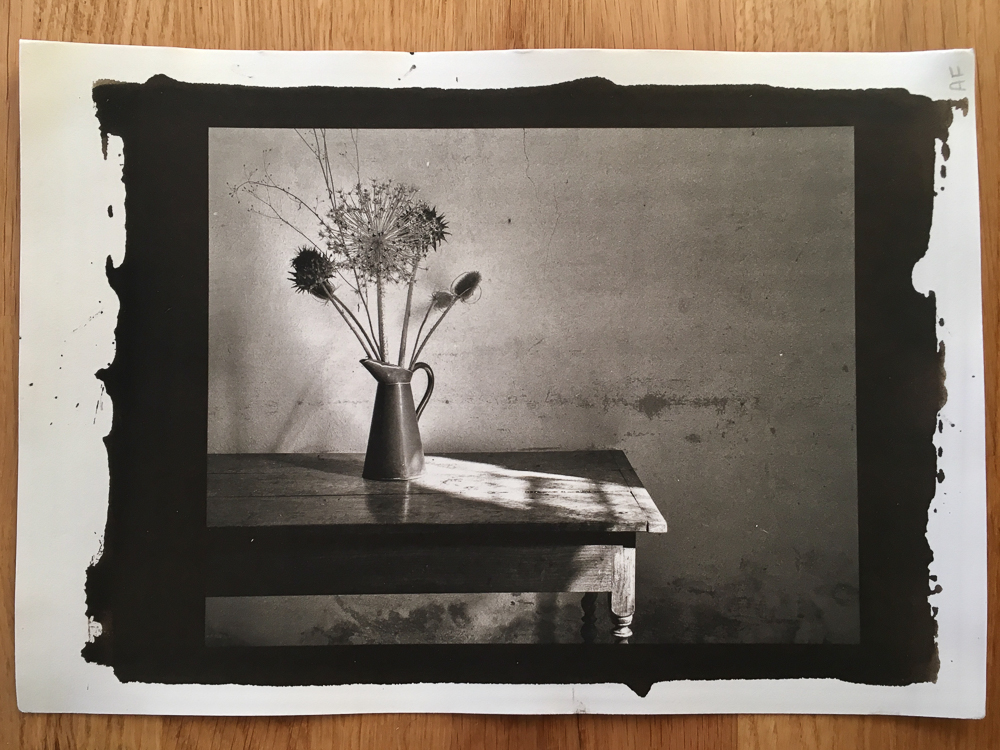
Seen on a screen it is in many ways no different to any other image except perhaps for the black surround of the coated paper which has been fully exposed to UV Light. This gives the print a unique character but the photograph itself would almost certainly be enhanced by an off-white mount with an opening which just shows the image. There is though a softness, or delicacy to the print. The range of tones and the way these tones blend together cannot, I don’t believe, be replicated in a digital print. This print is by no means perfect but it does illustrate what is possible by a complete novice with some expert guidance. The whole approach to this method of printing is very satisfying and tangible. It requires space, practice and patience but these combined can produce some beautiful results.
Peter Moseley was very giving in his teaching of alternative photographic printing and I most grateful to him for this insightful introduction into the complete antithesis of digital printing, even though the starting point can be a digital image. Fortunately for me Peter has a studio not far from where I live so I do plan to have a follow up session with him when I have had time to reflect on what I have learnt on the course. Contact printing greatly appeals to me as I can see that the process would suit some of the pictures I like to make. I might though start with Kallitype or Salt printing as the chemicals used are less hazardous, more readily available and considerably less expensive than Platinum or Palladium.
If you are interested in learning more about this technique for printing photographs and view some images using the various techniques available then you might like to visit this site – http://www.alternativephotography.com/
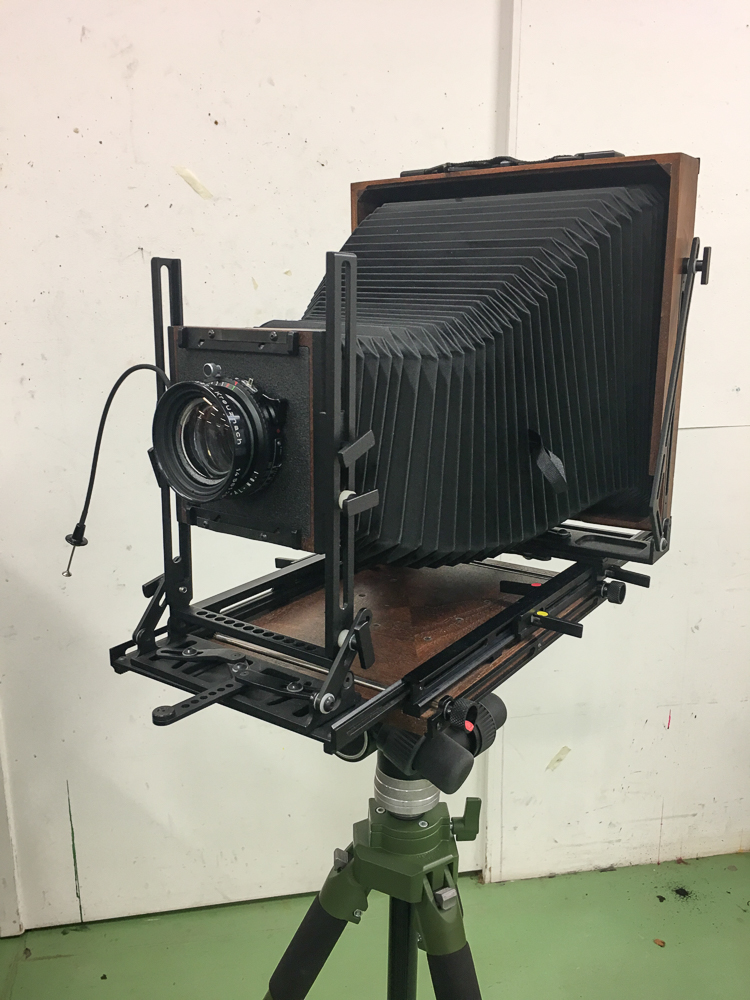
Whilst on the course we also had the opportunity to use Peter’s large format 10 x 8 field camera, take a few exposures and develop the film, but that’s a whole new story for another day!
And finally:- For a long time I have greatly admired the work of Ken Keen FRPS. Not only does he like to photograph medieval church interiors, he also prints his photographs using the alternative processes described in this post. Peter asked me if I knew of his work. I said I did and that I had found it inspiring. Peter went on to say that he knew Ken very well and he would try and introduce me to him the next time he was visiting the area. I cant wait!
I have written about Ken Keen on this blog and you can read the entry here. You can also visit his own website – https://kenkeenandlightfromthedarkness.com/ to view some of his superb photographs.

6 Responses to “Alternative Photographic Techniques – Platinum and Palladium Printing”
Thanks very much for your time and effort in producing this fascinating report. It has whetted my appetite to explore it further.
LikeLiked by 1 person
Thanks for your comment. I did the report as much to remind myself of the processes involved as well as encouraging others to an alternative in this digital age.
LikeLike
Absolutely fascinating and knowing your style/subject material from past posts, I can well imagine how drawn you are to the technique and resulting images.
I’ll look forward to seeing some images from the less hazardous chemicals and technique you suggested you might try experimenting with.
Thanks for sharing the link to Ken keen’s work. I’ll check it out.
LikeLike
The course and indeed the processes are and were fascinating. Not sure when I will get round to printing this way on my own. There will no doubt be a catalyst at some point which will inspire me to have a go. I hope you enjoy looking at Ken Keen’s photographs. Also worth viewing a short video about him on Vimeo. Not only does he make great images he is also registered blind which makes his work even more remarkable.
LikeLiked by 1 person
Fascinating to know that people still experiment with chemical methods of making prints from photographs. Really takes me back to my childhood and using ‘daylight’ paper and also making test prints to calculate the best exposure time.
LikeLike
I have never done anything like this before so I found it most interesting. I think there is something of a revival of film and of course vinyl records are making a come back. Perhaps its my age but I rather like the way things were done in the past! Thanks for your comment.
LikeLiked by 1 person