Posts from the ‘Photography’ category

Inspired by the Master photographer, John Blakemore – and my 300th post!

20170426-L1020338-Edit

Woodland on Ulva

I am a keen collector of books about photography and naturally the vast majority are by authors whose work I greatly admire. I find both the written word and the images can be inspiring, often providing little pearls of wisdom which might just help my own photography.  One such person is John Blakemore, a true master of the craft of black and white photography. Born in 1936 in Coventry, England he has been practicing his art since 1956, and in that time has built a portfolio of work which of its type is unlikely to be surpassed. Much of this work has now been archived at the Library of Birmingham.

He is probably best known for his landscapes and still life photographs. He is widely acknowledged as one of the finest monochrome printers, using the zone system to make some truly beautiful images – his use and control of tonality in a black and white photograph is quite superb.

I only have one of his books, titled – ‘John Blakemore’s Black and White Photography Workshop’. Whilst much of what he has to write relates directly to the traditional darkroom, his thoughts on tonality and printing can equally be applied to the digital darkroom as well. The book contains many of his best known photographs and if like me, you wish to improve your knowledge of black and white photography, this book is well worth adding to your collection.

So how did this book inspire me? How could his approach be applied to my own work?

One area where I have always struggled is trying to photograph woodland. From a composition point of view I find the subject matter very challenging. You could say I find it hard to see the ‘wood from the trees’, an old cliche perhaps but in my case a very true one. Even when the composition looks right I haven’t known how to process the image in a way which I find pleasing.

Recently I started reading through John Blakemore’s book and I came across a number of woodland landscapes which I very much liked. I enjoyed their treatment and this encouraged and inspired me. Having studied these images more closely I selected a few frames taken on my recent trip to Scotland to see whether or not I could emulate the ‘look’ of his work and process my pictures in a similar fashion.


20170426-L1020341-Edit

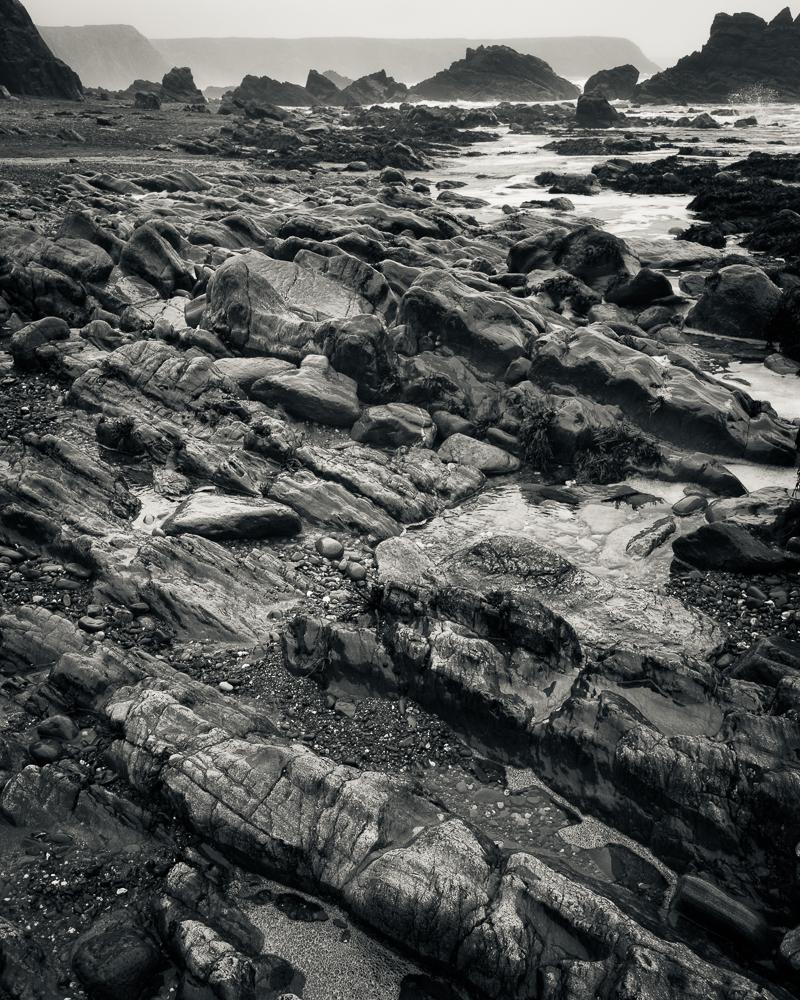
Boulders of Moss, Ulva


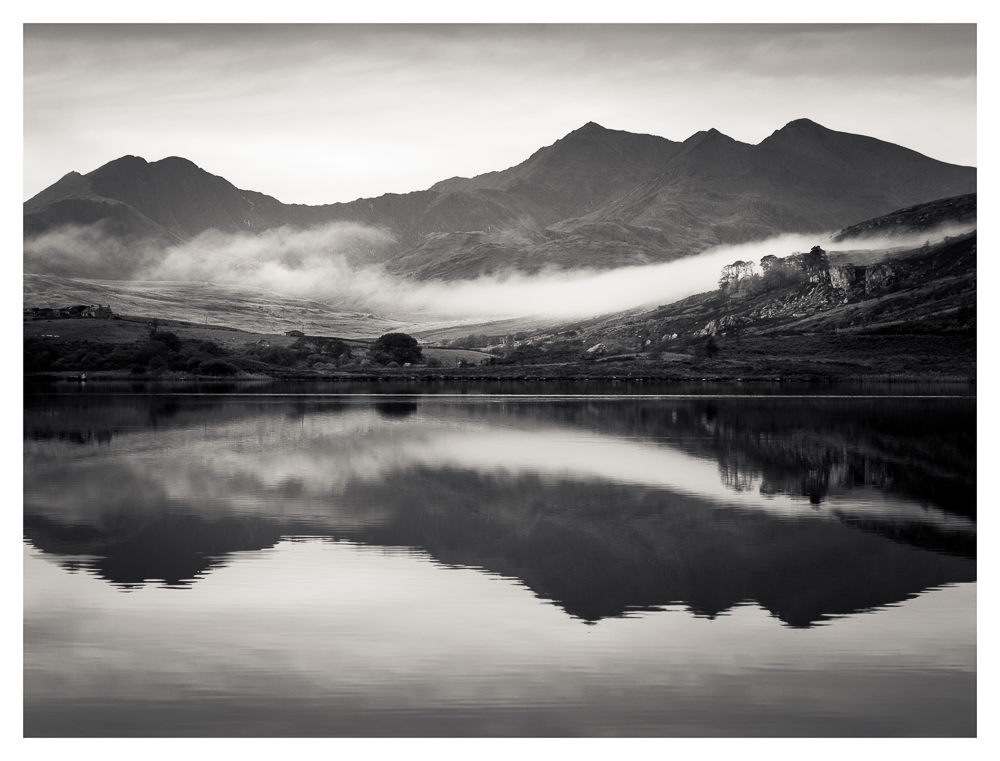
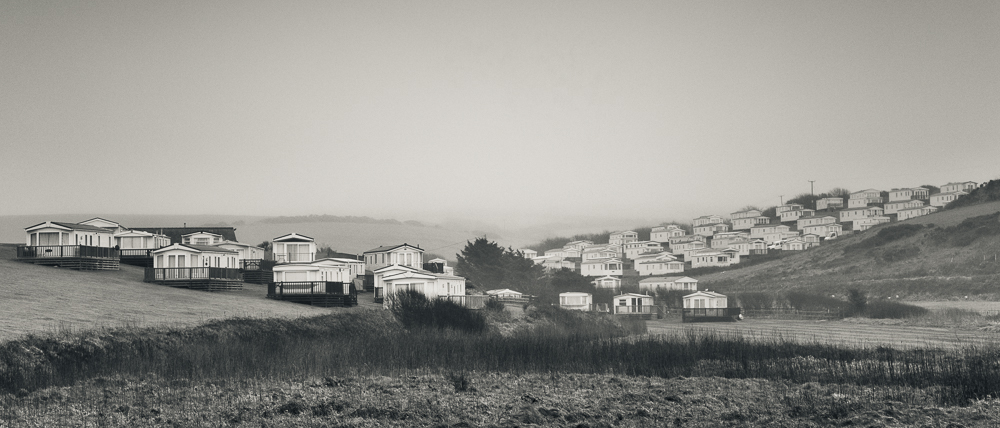
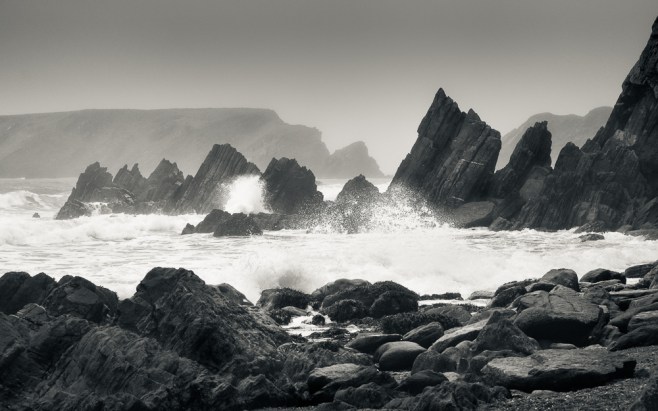
The tone curve in these four photographs is very different to the outcome from my normal processing methods and as a consequence this set of images work for me. Whilst there is a full range of tones, the mid-tones dominate each picture. Strong darker tones are my usual style, resulting in an image which has far more contrast. The images in this post are much softer and more restful to the eye. As a result I believe the viewers attention is held for longer so that the composition, the texture and form is more readily appreciated. A high contrast image can be quite punchy and dramatic but the eye can quickly tire when looking at an image of this type. These are far more subtle images and an approach I can see myself using again in the future. I will also be interested to see how they print on various types of paper.


20170429-L1020664-Edit

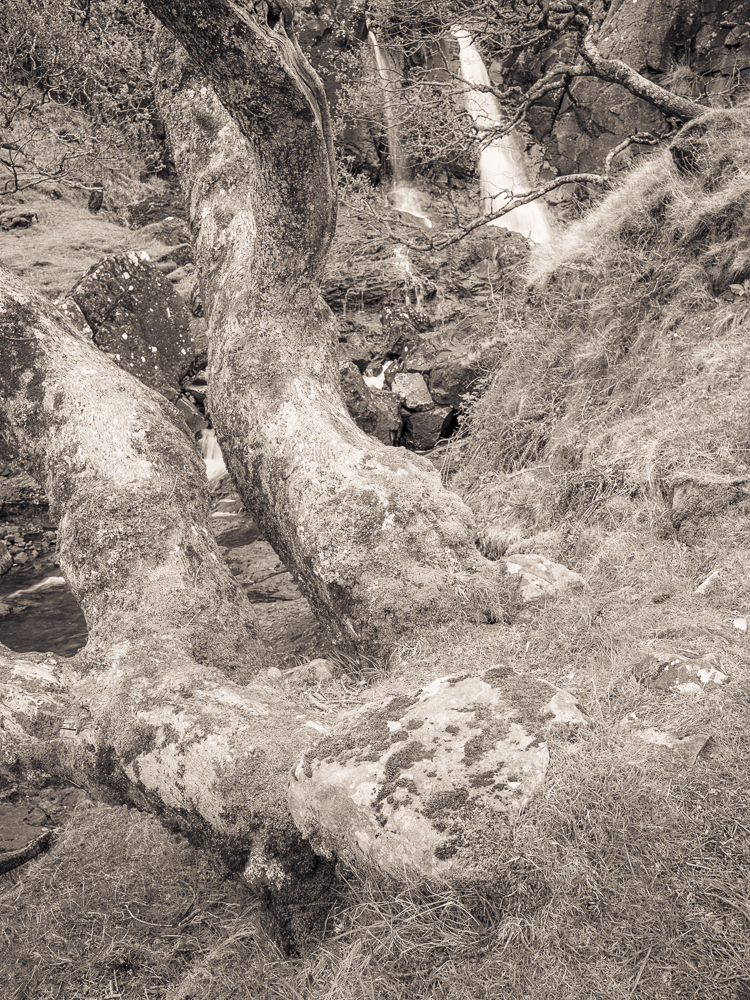
Eas Fors Waterfall, Isle of Mull


20170507-L1030047-Edit

Tree by a stream, Wester Ross


Your feedback and comments are very welcome and as this is my 300th entry, it’s an opportune time for me to thank all my followers who read, like and comment on my work. It’s very much appreciated and it’s one of the reasons I will continue sharing my images and thoughts in the future.

Lastly my thanks to John Blakemore for his inspiring approach to this art form.

As always these images are best viewed large, so do click on any one of the photographs and it will open in a new window.

Llynnau Mymbyr, Snowdonia – another one from the archives

20151028-L1004252-Edit

A few days ago I posted an image taken back in 2015 during a trip to Snowdonia in Wales, which I had not processed or shared before. Whilst searching the Snowdonia folder in Lightroom I also came across this picture. This shot of the Snowdon Horseshoe was taken looking down a lake called Llynnau Mymbyr. The obvious appeal to this image is the early morning mist hanging in wait for the sun to rise and its reflection in the calm waters of the lake. I clearly remember this scene and can recall that within a few minutes the mist had been burnt away and the very reason for taking the photograph in the first place had disappeared.

Early morning dew in Snowdonia – one from the archives

20151028-L1004287-Edit

Having posted a few images taken in Pembrokeshire recently, I thought I would return to a Lightroom folder named Snowdonia, which I visited back in November 2015. I stumbled across this photograph which I had never processed before. It had just been sitting on my hard drive but I am rather glad I found it.

I remember the morning it was captured. The tree was backllit and the early morning light glistened on the heavy dew which had formed on the grasses overnight. The dark background was the perfect foil for the solitary tree.

There is always the temptation to process images soon after they were taken but there is also an argument that you should let images mature, untouched for many months and then return to them at a later date before processing. Something which was dismissed at the first edit, is re-discovered and what a pleasure this can be. Not only finding a ‘lost’ image, but in the process remembering the visit, the location and the conditions…….. a very worthwhile exercise in my view.

Pembrokeshire – A ‘letterbox’ view

L1000301-Edit

As I write this post the sun is shining and Summer is almost here but these four images depict a very different time of year. They were all taken on the same day back in February. Some may say a typical late winters day in Wales, when nobody in their right mind would be out with their camera. Mist, drizzle and poor visibility. However these conditions can be ideal for the monochrome photographer.

In all cases the native 3 x 2 crop of the 35mm sensor included too much sky, and with little or no interest in this part of the picture I have cropped each image to what might be described as a ‘letterbox’. The aspect ratio is about 3 x 1, but what really matters is whether or not the crop works compositionally, and I believe it does. Photography is often about what you choose to exclude from the frame to strengthen a picture, not just about what is included already.

In the first shot taken at Newgale Sands, I focused on the foreshore which has softened the figures, the sea and distant rocks. This has helped to emphasize the misty conditions. The couple and their dog are an essential part of the image. The provide scale and as they are the only people on the beach they serve to reinforce the fact that the weather was so poor keeping most sensible people indoors, but for dog walkers and photographers!

L1000306-Edit

After taking the first shot I looked behind me only to find a swathe of mobile homes which overlook this section of coastline. Very quiet at this time of year, and only coming to life when the weather improves and the holiday makers return.

L1000338

Moving further along the coast I stopped at Little Haven. Conditions remained the same and this time I wanted to capture the tidal movement of the sea. Resting the camera on a wall I used a ND filter to give me  a slow shutter speed, about 1.6 seconds. Several exposures where necessary to give me the look of the movement in the sea water I was after.

L1000365

Finally a shot of what I assume is a farmhouse taken at Marloes. A typical dwelling in this part of the world but what appealed to me was the telegraph poles and how they could be used to create what I think is a pleasing composition.

Each picture looks better larger, so do click on an image to view a larger version which will open in a new window.


Marloes, Pembrokeshire – soft proofing in Lightroom

Marloes

If you read my blog on a regular basis you will probably have noticed that although I work almost entirely in monochrome, rarely are my images in ‘pure’ black and white – in other words they are toned. Either with a single colour, or more recently I have used a split tone where the highlights are toned with one colour and the shadows are toned with a different colour. This split tone is easily applied in Lightroom and the balance between the two tones can also be adjusted.


Screen Shot 2017-05-31 at 18.06.17


Whilst I like the effect of split toning it does present me with a new problem, and that is one of printing. I very much enjoy the process of printing; in many ways it’s the rightful conclusion to everything that has gone before it. In the past printing a ‘pure’ black and white photograph was fairly straightforward from my point of view. The fact that my monitor wasn’t properly calibrated (good but not great) didn’t matter hugely to me; I could produce a perfectly acceptable print by observing the histogram, processing accordingly and adjusting the contrast to achieve the look I was after.

With split toning, however subtle the effect, I am now printing a ‘colour’ image, so what I see on the screen and how that image is produced in print becomes much more critical. The choice of paper (and there are now so many excellent photographic papers), use of the appropriate colour profile for printing, as well as having a correctly calibrated monitor, now all play a more important part than they did before.

For these reasons I started exploring the soft proofing panel in Lightroom which forms part of the ‘Develop’ mode. It is easily opened by pressing ‘S’ on the keyboard. From here you can select the colour profile for the paper you wish to use and select either perceptual or relative as the intent. From here Lightroom will create a virtual copy of the image with the colour profile and intent embedded. The name of the file/copy will include a reference to the colour profile, which is a very convenient feature for future reference. This is an invaluable benefit and one that Lightroom makes so easy. Depending on how the image changes its appearance in soft proofing you can go on to make the usual processing adjustments to the contrast, clarity, exposure etc so that the image reflects how you want the photo to be printed. By choosing a matt paper colour profile I found the proof copy was much ‘flatter’, it lacked contrast when compared to the original image. In processing I added back more contrast to the proof copy.


I do not own a device for calibrating my monitor and perhaps that is something I should acquire in the future. In the meantime I did use the Display Calibratior Assistant on my iMac and whilst not a precise tool, I have been able to calibrate my monitor to more closely represent what comes out of the printer.


There is no question that I still have more to learn regarding printing and with two exhibitions on the horizon this year; one in July and one in November, I am very keen to make a decision on my choice of paper and be able to produce consistent results. More test printing is required. I also know that Photoshop has a soft proofing feature and in time I may look into this as well but for the moment Lightroom seems to be a very straight forward way to achieve the results I am wanting.

I shall leave you with a few more images of Marloes in Pembrokeshire, Wales. Fortunately when I visited this location earlier in the year, the height of the tide was just about right – ideal conditions for some dramatic coastal photography.


Please note that I am using Lightroom 5 and I am not using the most recent operating system on my iMac, so the screen grabs may look different. To be frank I am not a great one for always upgrading to the latest software. If it works then I don’t feel the need to automatically change anything. I do realise this might get me into trouble one day but for now I’m very happy with what I’ve got and it works for me!