Posts from the ‘photo exercises’ category

After dark in Chichester


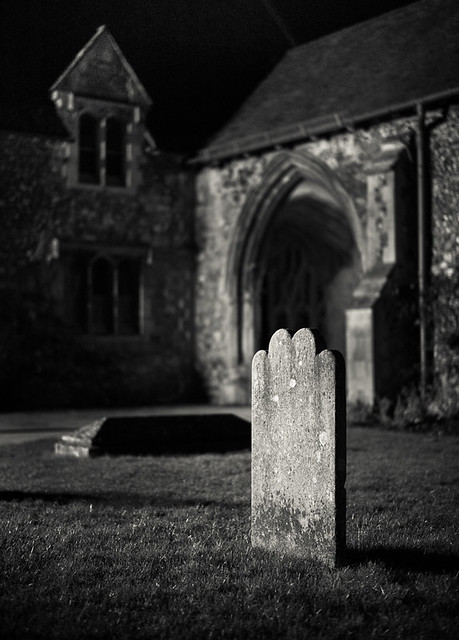
Gravestone

Gravestone
In the grounds of Chichester Cathedral
1/180 sec.


There is one particular advantage to the short days of winter, it gets dark very early. Obvious I know, but when I decided a few days ago to take some shots after dark, I was able to do so at a civilised hour, in fact shortly after I had finished work. I very rarely take photographs after the sun has disappeared below the horizon, so I took my Leica M Monochrom to work and on the way home stopped in the centre of the City of Chichester to see what I could find. I limited myself to an area very close to the the Cathedral, as I only had an hour to spare.

I set the ISO to 6400, and the 50mm Summilux lens to f1.4, its widest aperture opening. These settings gave me fairly fast shutter speeds, which allowed me to comfortably hand hold the camera without having to resort to using a tripod. Just as well really as I didn’t have one with me and even if I had, I wouldn’t have wanted to use it. This exercise was more for fun. It was a test to see how the Monochrom worked in very low levels of light, even though I did make use of the artificial light sources available, including the flood lights which illuminate the Cathedral.

This exercise has made me think what might be possible shooting after dark. The joy of being free from a tripod is quite liberating and having looked at the exif data I could easily have used a lower ISO setting. Nevertheless the grain or noise at ISO 6400 does not in my opinion degrade the quality of the image, but on reflection ISO 3200 might have been more appropriate.

All the photographs were processed in Lightroom, and to finish I applied a tone to give the the images a little more warmth.


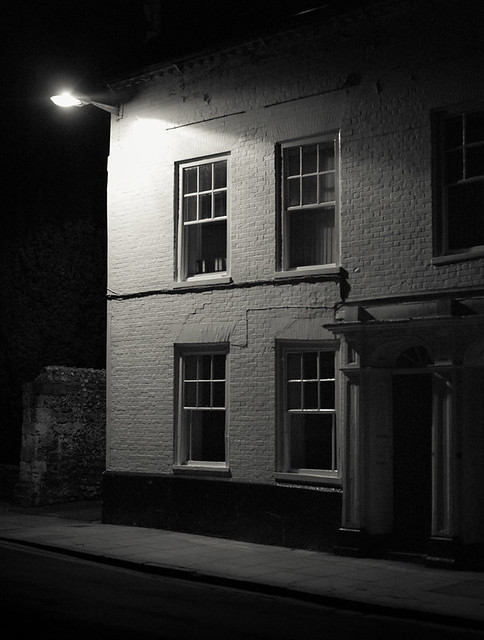
West Street

West Street, Chichester
1/1000 sec


The young couple

The young couple
1/90 sec


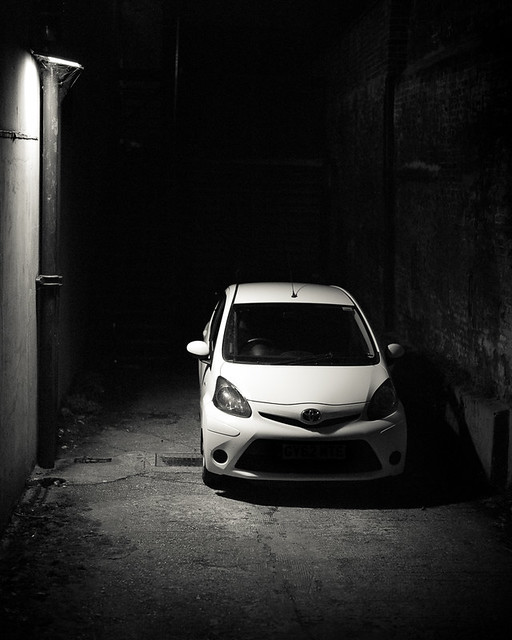
Alley car

Alley car
1/500 sec


Old glass window

Old glass window
1/250 sec


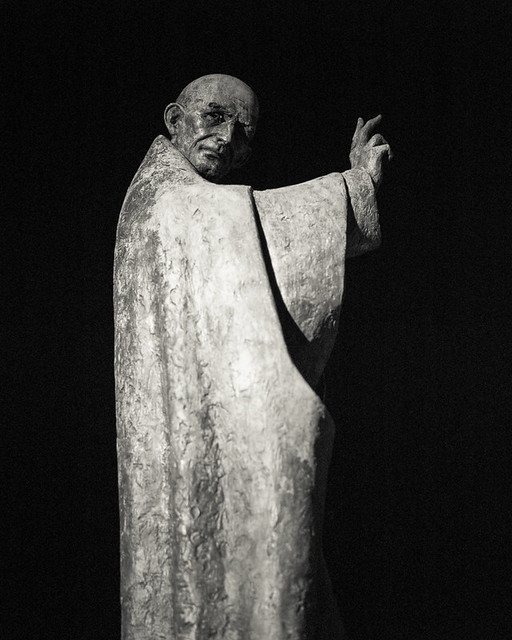
St Richard

St Richard
1/750 sec


Flying in a new direction perhaps?

As far as my landscape photography is concerned I consider myself to be something of a traditionalist. I tend to adopt a rather ‘classical’ approach which may produce a very pleasing image, (I hope so anyway!) but it may not cross the boundary into something which might be remotely described as artistic.

Having given this a little more thought, I remembered an image I took back in February which might lend itself to a different and arguably more artistic treatment . So here is the result of my attempt at being a bit more arty!


In flight
In Flight
The crow flies away from the gorse, which is surrounded by the dune grasses
of East Head on the West Sussex coast.

As well as using my normal processing in Photoshop I have also applied ‘grain’ using Silver Efex Pro2, which I think adds something to this particular shot. It wouldn’t work for every image but I was keen to create a more atmospheric look, as well as having a bit of fun in the making.

I have to say that I was inspired to take a fresh look at my work by the work of the Welsh photographer, Chris Tancock, and in particular his on-going project called Beating the Bounds, where he explores ‘five fields over a period of five years’ and documents the changes which take place over time. Chris describes himself not as a landscape photographer but as a rural documentary photographer. I would simply call him an artist, who through his excellent work tells an intimate story about the world that surrounds him. If you have not come across his work then do click through to his website on one of the links.

Does this mark a photographic change in direction? Probably not, but I do think its very important to try new things, be willing to experiment and to challenge established techniques. At the same time it’s essential to enjoy the whole process, irrespective of the end result. Is it art? I don’t know, but I do know that I had a lot of fun making the image and that’s what really matters as far as I am concerned.

!function(d,s,id){var js,fjs=d.getElementsByTagName(s)[0];if(!d.getElementById(id)){js=d.createElement(s);js.id=id;js.src=”//platform.twitter.com/widgets.js”;fjs.parentNode.insertBefore(js,fjs);}}(document,”script”,”twitter-wjs”);

Lake District 121 – pre-visualisation and post processing techniques

This is the penultimate entry about my 121 workshop with Paul Gallagher in the Lake District. There will be a final post concerned with ‘black and white’ printing to complete the series.

When Paul and I first met in the lounge of The Crowpark Hotel in Keswick, one of the things I said I would like to learn more about was how to pre-visualise the finished photograph before releasing the shutter. To start to think of the photographic workflow as one cohesive process, as opposed to a number of separate steps from seeing, to taking, to processing and finally to print or uploading to the web. This one step followed by another had largely been my way of doing things to date, so I wanted to try and link these stages together and change the way I thought about my approach to photography.

Common sense told me that what happens during each stage must have an impact on the next, and so on down the line. I guessed that by pre-visualising the finished image at the outset, decisions could be made at each stage, as the finished image could already be seen in the mind’s eye. The skill therefore would be to know what might be possible and to take the photograph with this is mind.

For me this idea of thinking ahead was best demonstrated when Paul and I drove through Newlands Valley. I spotted a small group of trees on the horizon and although when we first arrived at this scene the clouds were universally grey, there was some movement in the sky, so we set up our cameras for the shot in the hope that the sky and light would improve…….and after about 20 minutes it did.

Straight out of the camera the RAW image looked like this; not too inspiring you might think but Paul had already talked me through his pre-visualisation of the ‘finished’ shot. I used a 1 or may be 2 stop graduated filter just to balance the exposure values between the sky and the foreground.

20130223-P2230146-2.jpg
1

Back in the digital darkroom and using Lightroom I applied a ‘preset’ to boost the clarity, remove any chromatic aberration and apply a modest amount of sharpening. The next stage was to adjust the saturation and luminance of the blue channel, knowing that when the image was converted to black and white there would be the opportunity to increase the contrast in the sky. Having made these adjustments the RAW image now looked like this.

20130223-P2230146.jpg
2

An improvement on the first image but hardly a photograph to get excited about. The next stage was to import the RAW file into photoshop and then convert the image to monochrome. Using ‘Image’ – ‘Adjustment’ – ‘Black and white’ a window opens which allows you to make adjustments to a range colour channels. Having boosted the saturation and luminance of the blue sky in Lightroom, I further darkened the blue channel to a value of -80. The resulting image is shown below.

20130223-Tress b&w image adj.jpg
3

You might be forgiven for thinking this image is now worse than the colour version and I would probably agree but the next stage really brings the photograph to life. A ‘levels’ adjustment layer was applied and now the image looks like this.

20130223-Trees b&w levels adj.jpg
4

However  some further fine tuning in photoshop was required. A number of ‘curves’ adjustment layers were made to selected areas of the image, before finally sharpening the trees and the foreground, but not the sky. The final adjustment was to crop the photo to balance the composition. Paul is a great believer in cropping to suit the image and not be concerned whether or not the end result conforms to one of the common aspect ratios – i.e. 3×2, 4×3, 5×4 or 1×1. Why be constrained by uniformity if a more custom approach is adopted and enhances each individual image? When I went on the workshop to the Isle of Eigg with Bruce Percy he was a very keen advocate of 5×4 or 1×1, couldn’t stand 3×2, but rarely I think breaks away from the first two aspect ratios. His choice of course but it was good to hear another view. For now I will keep my options open and simply show the finished image.

Trees
Three Trees – the finished photograph
OMD EM5 on a tripod with Panasonic f2.8 35-100mm lens
42mm f13 1/100sec ISO200 

Personally I really like this shot. I love it’s simplicity, the shape and size of the three trees and how their alignment echoes the diagonal line of the clouds. The ability to pre-visualise this shot at the outset is a great skill and is at the very heart of the photographic process. It’s a skill which I doubt is ever mastered but with practice out in the field my knowledge can only grow with time; after all Paul has been practising his art of fine black and white photography for nearly 30 years.  For me though it has opened my eyes to what is possible and that in my view is a great place from which to start.

!function(d,s,id){var js,fjs=d.getElementsByTagName(s)[0];if(!d.getElementById(id)){js=d.createElement(s);js.id=id;js.src=”//platform.twitter.com/widgets.js”;fjs.parentNode.insertBefore(js,fjs);}}(document,”script”,”twitter-wjs”);
Lake District 121 – Post Processing

One of the things I was keen to learn from Paul Gallagher during my recent workshop in The Lake District, was the art, and it is an art, of post processing a RAW file to produce a strong black and white image.

Up until my trip away I had used a combination of Lightroom and Silver Efex Pro2. Rarely would I use Photoshop even though it’s regarded as the ‘daddy’ of all software programs for image editing. Lightroom shares the same Raw converter as Photoshop and is a wonderful tool for your photographic workflow, from importing the images, key-wording, developing and finally to print or uploading to the web. However it does not touch Photoshop when it comes to the fine art of processing a really good black and white image. However I was daunted by the fact that the skills and knowledge to use Photoshop well, take a long time, so I was delighted when Paul demonstrated a few simple techniques which with a little practice I have now been able to apply to the shots I took on the trip.

In the following example the first image on the left is the original RAW file with no adjustments. It’s just as it was when imported from the SD card into Lightroom. The reason for the blue colour cast is down to the fact that this was a 60second long exposure using the Hi-Tech 10 stop ND filter. The second image on the right has simply been converted to black and white and whilst the blue cast has been removed, the image is very flat. The third image is the finished photograph.

20130222-P2220098-2.jpg
RAW file – straight out of the camera

20130222-P2220098.jpg
RAW file with simple black and white conversion
Wastwater Rocks
Wastwater Rocks – the final image

So what simple steps were taken in Photoshop to arrive at this end result? 
Well, firstly in Lightroom I applied a preset which boosted the clarity to a value of 15 and which also applied some sharpening. Amount 50 – Radius 0.5 – Detail 50 and Masking 0. The preset also eliminates any chromatic aberration   created by the lens I used for this shot – the Panasonic f2.8 12 – 35mm. On this occasion CA would not have been visible given the blue colour cast.
Secondly I exported the image from Lightroom into Photoshop CS5. Using ‘image – adjustment’ I then converted the RAW image to black and white. This was followed by a ‘levels’ adjustment layer to move the black and white points on the histogram, to give a full range of tonal values. The ‘mid point’ can also be adjusted if required but was not changed for this particular shot. 
The next stage was to make local adjustments to certain sections or specific areas of the image using the lasso tool to select the area and then apply a curves adjustment layer. The choice of ‘pixel feather’ is critical to make sure that the adjustment only applies to the area required. This is really where a small but subtle change can make quite a difference. I don’t consider myself to be an artist but there is no question that these small changes are the equivalent of applying the finishing brush strokes to a painting. Poor technique in both cases could ruin a good image, the only advantage of Photoshop is that you can ‘step backwards’ or delete a layer. With a painting it would be much more difficult if not impossible to undo. Knowing when to stop is also very important. An image can very quickly look overworked. Once all the adjustments had been made all the layers were ‘flattened’.  (Layers – flatten image).
The last stage was to apply further sharpening using filters – unsharpen mask. Not all areas of an image require or should be sharpened; the sky for example, so a layer mask should used. I created a duplicate layer of the background layer and applied the sharpening to this new layer so the ‘original’ background layer remained unaltered. Once I was happy with the amount of sharpening (easily previewed) the  again I ‘flattened’ both layers. 
Finally I ‘saved as’ a TIFF file and gave the image a title. Once done this new image is saved in the same folder in Lightroom, so it appears alongside the original image. This is a great advantage as I can still go back and carry out another conversion should I wish.

I think there is still a place for Silver Efex Pro2 in my workflow. After all it has been my default plug in for black and white conversions until now. However my eyes have been opened to new ways of working and I am delighted to have learnt some new skills.

Paul talked about other processing techniques and choices that need to be made before post Processing even starts and I will cover some of these key points in my next entry.

!function(d,s,id){var js,fjs=d.getElementsByTagName(s)[0];if(!d.getElementById(id)){js=d.createElement(s);js.id=id;js.src=”//platform.twitter.com/widgets.js”;fjs.parentNode.insertBefore(js,fjs);}}(document,”script”,”twitter-wjs”);

Lake District 121 – using filters

In the previous post I wrote about camera technique and in this entry I will cover the use of a variety of different filters to either control exposure or to be a little more creative. Whilst using filters does add another process to the taking of an image, my tutor Paul Gallagher is I believe right in expressing the view that the more you can ‘get correct’ in the camera when taking the shot, the better the RAW negative is to work with when you reach the stage of post processing. It’s also true that some effects simply can’t be replicated in Photoshop or for that matter any software; for example the use of a polariser.

In the case of the shot below a 2 stop ND hard grad was used to balance and control the exposure as the sky was much brighter than the foreground. Whilst the shot could have been taken without the filter, there would have been the distinct possibility of either blown highlights in the sky or no detail whatsoever in the shadows, neither of which would have been desirable or recoverable in post processing.

Trees
Trees in Newlands Valley

In the second shot below I used a polariser in order to control the amount of reflection coming off the surface of the water, so that the rocks below would be visible. Had this area of the picture just been black, which would have been possible using the polariser, then the foreground interest would have been lost. Paul reminded me that using a polariser had the same effect as a 2 stop ND filter, therefore increasing the exposure time. In this case the exposure was half a second which I think gave the right amount of movement in the water.

Waterfall by Honister Pass
Waterfall study near Honister Pass

In the next shot I used a 10 stop ND filter to slow the shutter speed right down. In the case of this particular shot the exposure time was 60 seconds at f11. I found that some experimentation was required when taking this type of shot, firstly to get a balanced exposure and secondly to create the desired effect. Using a long exposure does give an ethereal appearance to the water as any ripples become merged and therefore lost, and cloud movement is also evident.

Buttermere
Buttermere

It is of course possible to use a combination of filters but more than two at a time can reduce the sharpness of the image as the optical quality of the filters are good but not that good! In the case of the 10 stop ND filter it also produces a strong blue colour cast which is fine if converting to black and white but may not be so easy to lose in post processing if the end result is a colour image. Another advantage of using this filter is that any people or birds entering and leaving the frame during the exposure may not always be recorded by the sensor. The image below would have suffered had the ducks swimming around at the time been part of the finished result!

Elterwater
Elterwater in Langdale

It perhaps goes without saying that a tripod is an essential piece of photographic equipment. for landscape work. None of these shots could have been taken without one. Adjusting the legs and indeed the tripod head can be time consuming in order to achieve the right composition but it does slow the whole process down, and makes you think about what you are doing. This can only be a good thing – as the tortoise said to the hare!

!function(d,s,id){var js,fjs=d.getElementsByTagName(s)[0];if(!d.getElementById(id)){js=d.createElement(s);js.id=id;js.src=”//platform.twitter.com/widgets.js”;fjs.parentNode.insertBefore(js,fjs);}}(document,”script”,”twitter-wjs”);