Bosham……Before and After in Capture One Pro

Today Capture One Pro launched a free and very worthwhile upgrade to their editing software. There are a number of enhancements, bug fixes, support for new cameras etc, but in terms of the user experience there are two significant changes which I thought I would try out for myself.
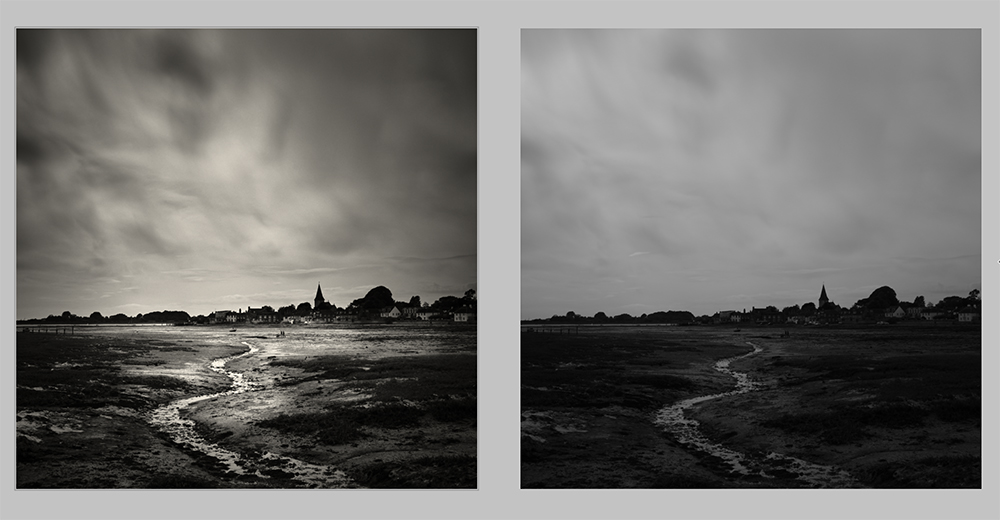
Firstly there is a very useful ‘before and after’ view. The vertical line can be moved to the left or right allowing you to see more or less of one side of the image or you can toggle between a full view and this vertical divider. Nothing ground breaking here, but in earlier versions of Capture One the functionality was not particularly user friendly, so the enhancement is now simple to use and a great improvement.
The other major improvement relates to the healing and cloning tools. The changes made are a huge leap forward. When I first started using Capture One Pro a few weeks ago these were arguably the tools that disappointed me the most. They didn’t work well for me at all, so I was finding myself exporting and then editing the image in Photoshop, something I also found necessary if trying to clone or heal in Lightroom. Time consuming and frustrating in equal measure.
With the new upgrade this work-around is no longer necessary. Healing and cloning can now all be done within Capture One and although I have only had a limited time to test the results, my first impressions are very good indeed. One more reason perhaps not to continue paying my Adobe subscription!
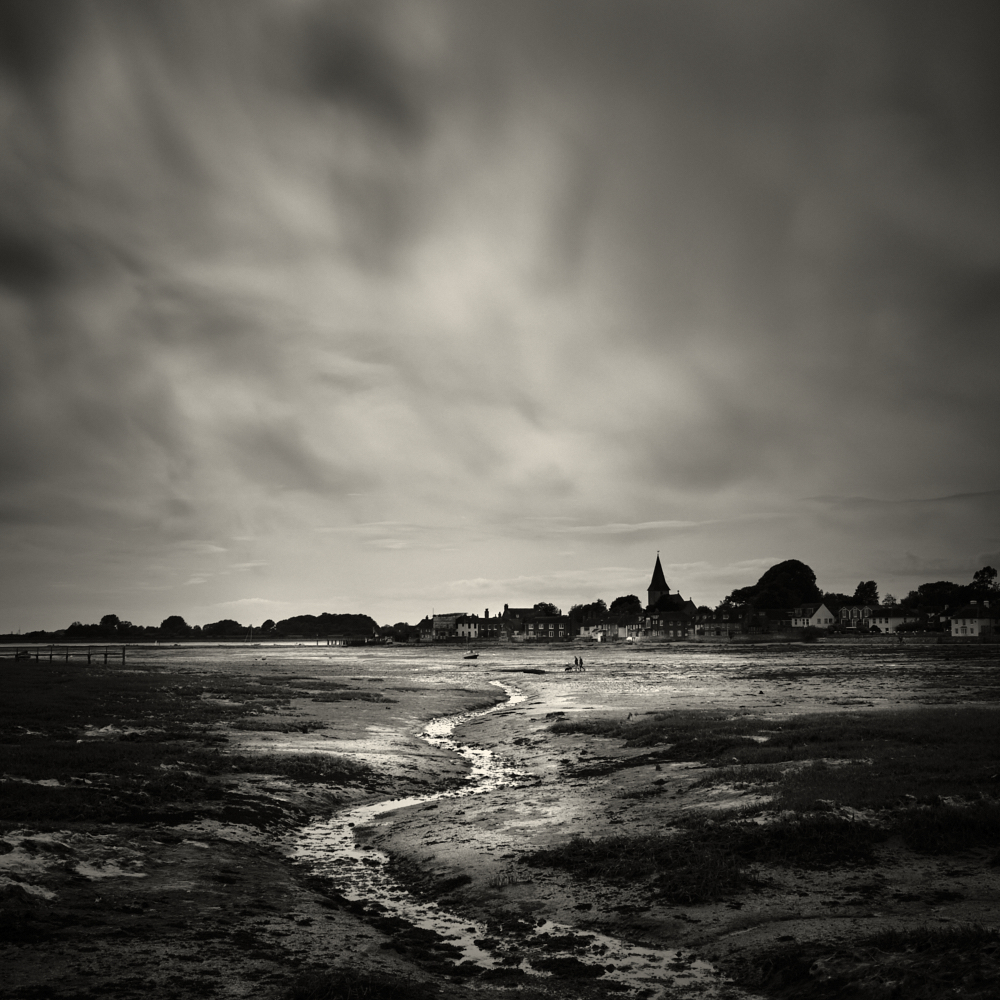
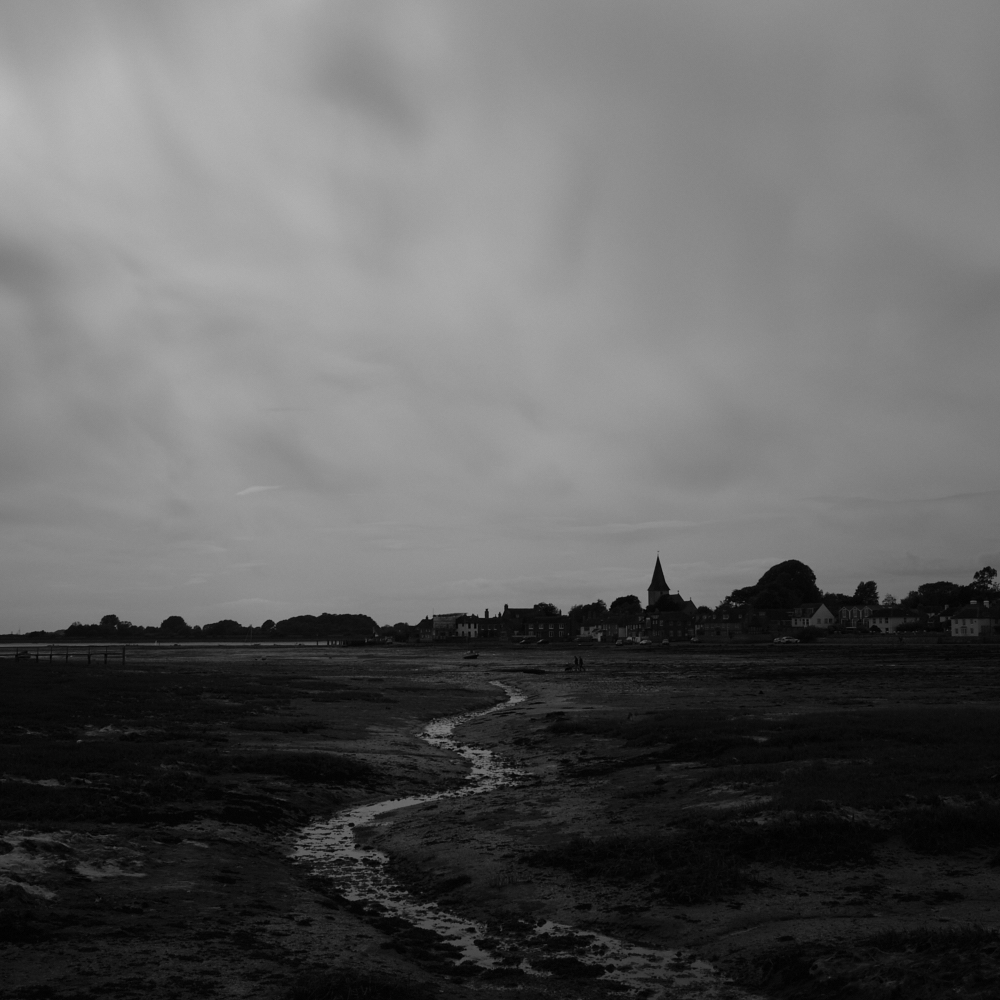
To illustrate what is possible in Capture One Pro, I have today processed this image of Bosham. It was taken on my daily ‘Lockdown’ bike road a couple of days ago. I had noticed an interesting and appealing sky so decided to alter my planned route to take in Bosham Harbour. You can see from the original RAW version how flat the image was, but there is texture in the sky and I knew from experience that this shot had potential with careful processing. I used 8 layers in total. Layers are not possible in LR but are of course at the heart of Photoshop. Capture One Pro is an ideal ‘best of both worlds’.
This shot also illustrates what I love about the creative possibilities of black and white photography. I am also thoroughly enjoying the combination of the Fuji Raw files and the processing capabilities of Capture One which have been enhanced today and greatly improved.
Stay well, keep safe and have fun if you can.

7 Responses to “Bosham……Before and After in Capture One Pro”
Like the image very much, glad C.one is working for you.
Remembered why I gave up on it, cataloguing images for me, slows it done a lot!
Wish I could just jump in, process one image and out again. Can’t find a way to do it, probably me being inadequate when it comes to new stuff.
LikeLike
Hi David. This is possible. Just create a session, any session and don’t import the image. Navigate to the image via the Library> Folders. Process then Export to the same location as a Tiff. Then back in Lightroom synchronize the containing folder to show in Lightroom. Here’s a video going through the process slightly differently to mine. In the comments the exact system I used is described. https://youtu.be/l0PL2Q8uhg8
LikeLike
Many thanks, will give it a go.
LikeLike
Thanks for your contribution. I don’t need to go down this path myself but always useful to know. Alan
LikeLike
Thanks very much David, and I am pleased another follower may have an answer to your question.
LikeLiked by 1 person
Excellent editing. You’ve certainly brought the best out in the raw file.
LikeLike
Thank you Vicki. Needed to work a little harder on this one, but it does demonstrate what’s possible.
LikeLike