Bamburgh Castle – the before and the after

I don’t think I have ever done this before but I thought I would walk you through my thoughts and the creative process in the making of this monochrome image of Bamburgh Castle in Northumberland. I hope you will find it interesting.
When composing the image and releasing the shutter I already had in mind what I hoped to achieve in the finished picture. I used a Zeiss 18mm wide angle lens set at f11 so everything would be sharp and in focus. However I wanted movement and drama in the image and this was achieved by using a long exposure of 30 seconds. Straight out of the camera this is how the RAW image appeared in Lightroom.
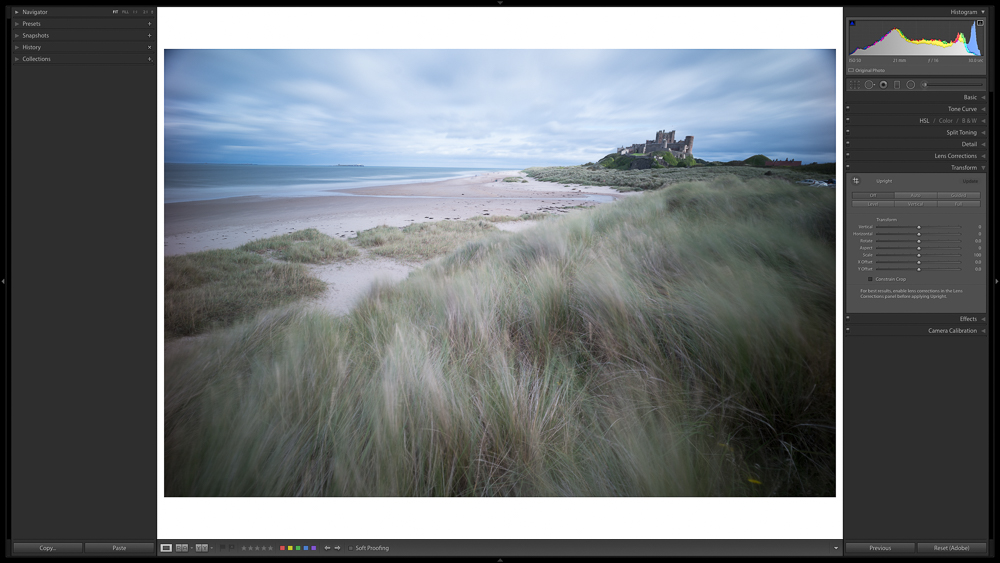
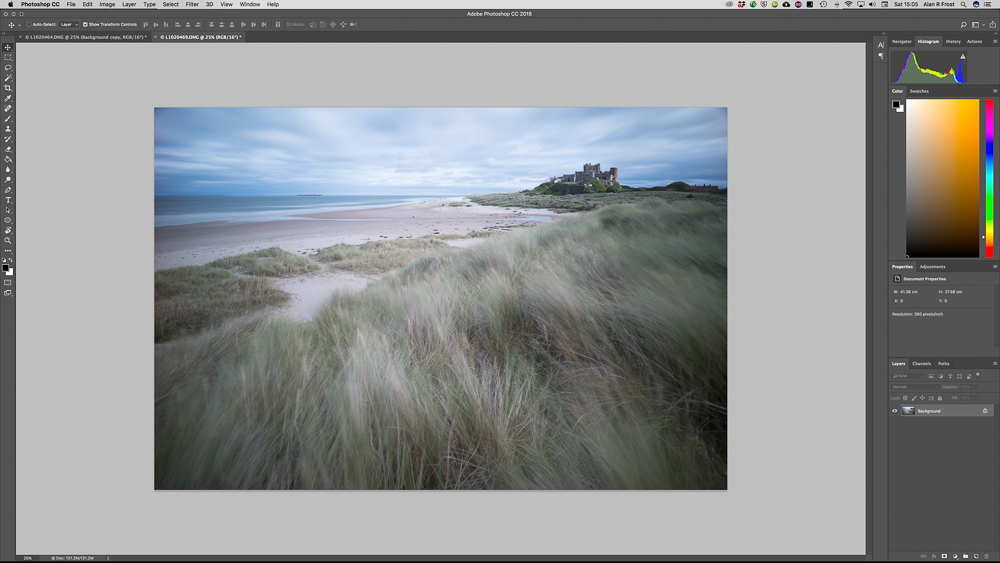
My initial impressions of the file were good. The histogram was all but perfect – a complete range of tones with no clipping in the highlights or in the shadows. There was some good texture in the sky and to my eye the right amount of blurring of the grasses. However the horizon line wasn’t level and the wide angle lens had distorted the castle. I rotated the image in Lightroom and corrected the distortion using the Transform (skew) tool in Photoshop. I also noticed some vignetting in the corners but didn’t think this would be a problem in the finished image.
A detailed view of the castle shows the amount of distortion which needed correction.
After these initial adjustments the image now looked like this.
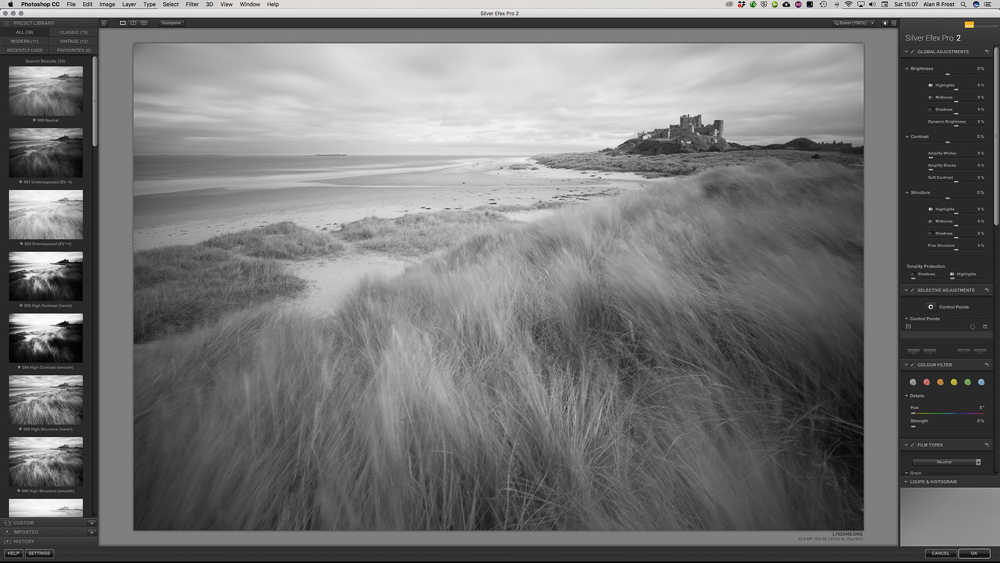
I then created a duplicate layer in Photoshop so that I could convert the image to black and white using Silver Efex Pro. A straight mono conversion looks rather bland with no contrast. This is no different to what I would expect and I know from experience this is a very workable file.
At this stage I start to visualise how I want the final image to appear. I already know from the histogram that I have a good range of tones which provides me with plenty of scope to process the file in any number of ways. Black and white photography has this great flexibility to be very creative and this has always appealed to me.
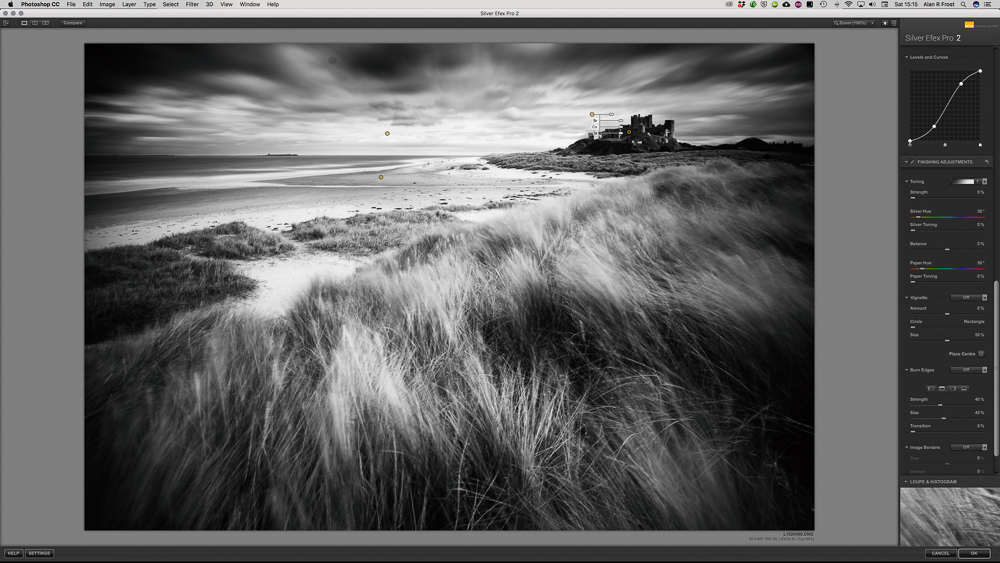
In Silver Efex Pro I will often start with one of the presets (the thumbnails in the left hand column). Having applied the preset ‘high contrast – smooth’ it gives me a starting point but nothing more. (See below)

I now work quite intuitively and because I have used this software for many years I instinctively know which sliders and control points to use to give the result I am looking to achieve. Fairly obviously I have lost detail in the sky which I need to restore. The foreground is too dark, lacking detail in certain areas and the overall contrast is too great. The castle is virtually a silhouette and I need to lighten this part of the picture.
I go ahead and make these changes which are done in the space of just a few minutes. I feel I am now getting close to what I consider to be the final picture. It’s better but it’s still not right.
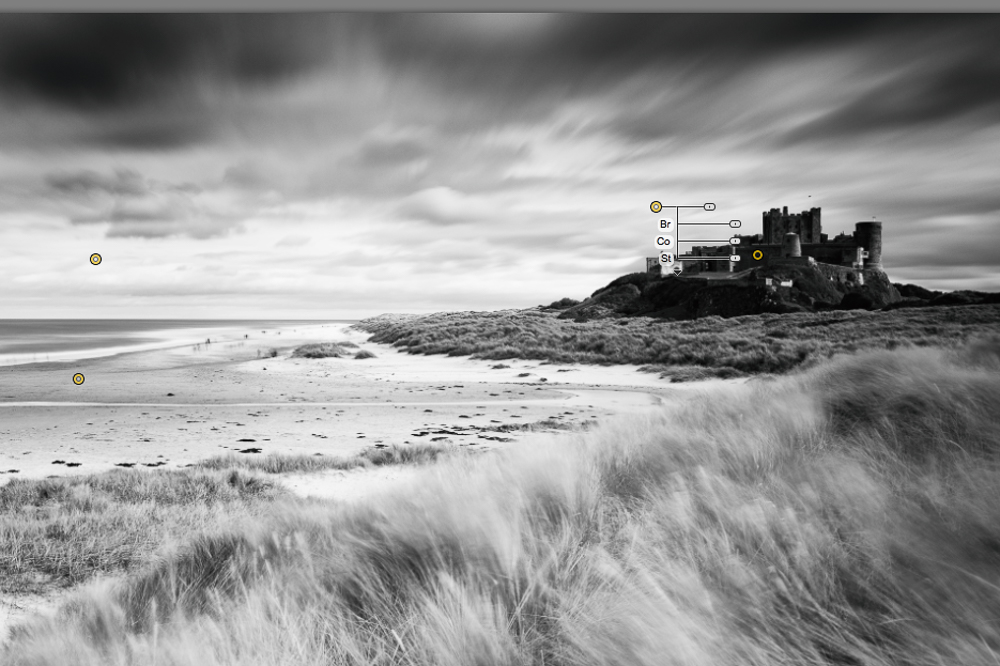
The screen grab below shows a crop of the image indicating some of the control points I have applied to selectively darken or brighten certain parts of the image.
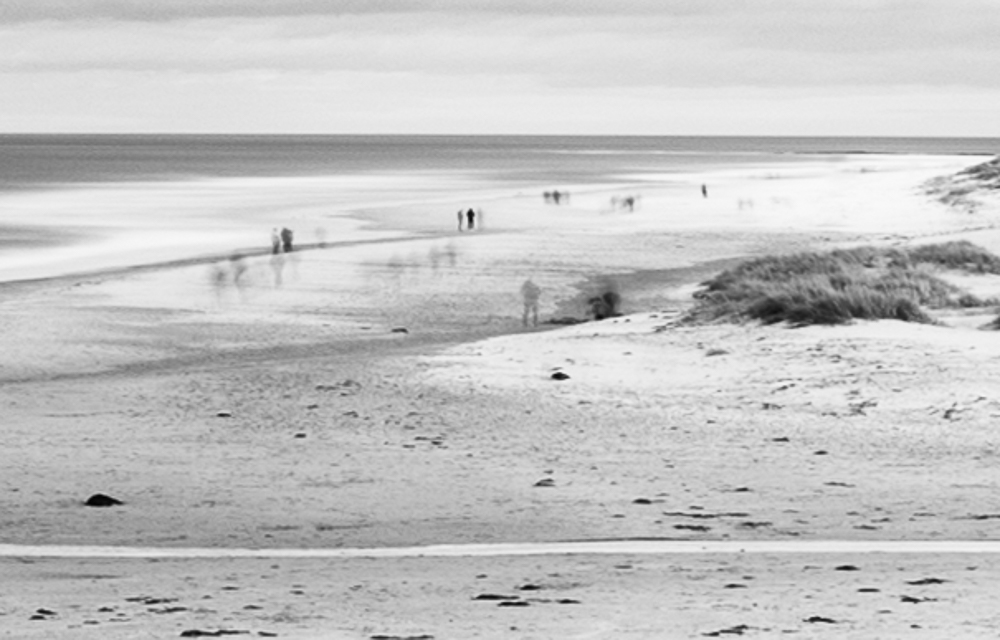
It’s at this point that I became more aware of the ‘shadowy’ figures on the beach to the left of the castle. Do I leave them in or clone them out? It’s a personal choice but I took the view they are more of a distraction and being so small in the frame they don’t really add anything to the photograph.The content aware tool in Photoshop quickly ‘cleans up’ this area.
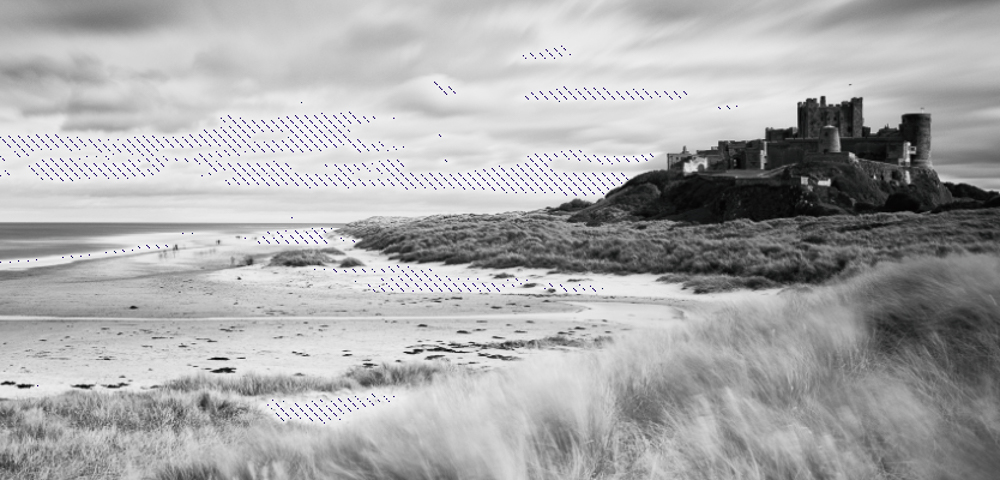
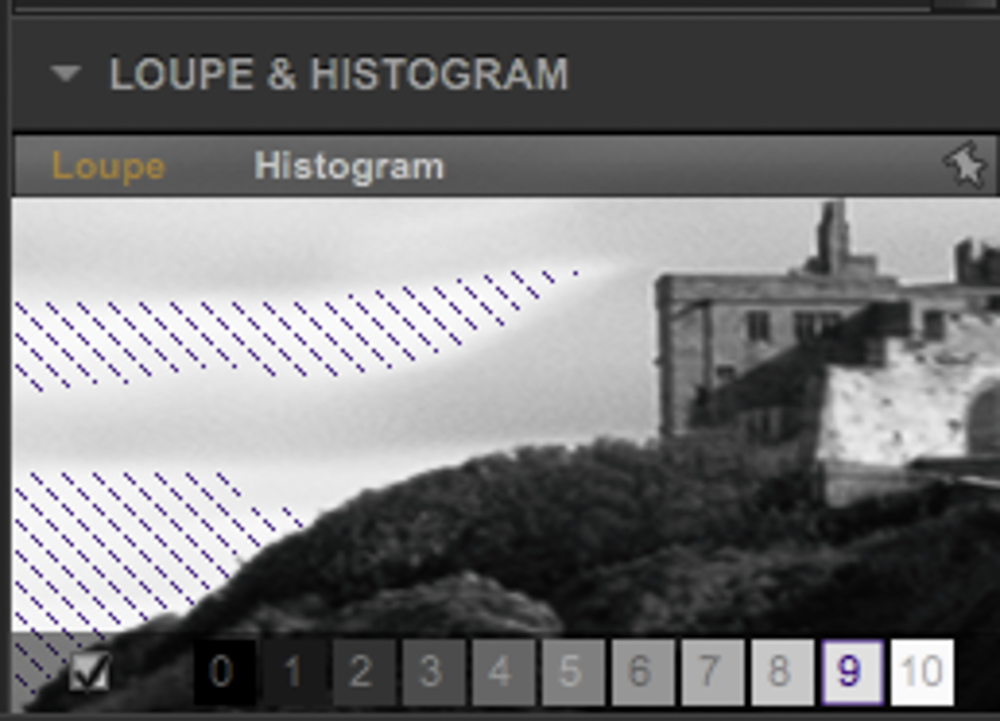
I am now at the stage where I am checking the finer but all important details. As I will almost certainly want to print this photograph I don’t want the brightest areas to be in Zone 10. Silver Efex has a very useful feature whereby you can hover the cursor over one of ten zones and it will highlight parts of the image which correspond to that degree of brightness.
Having done this I close Silver Efex, flatten the image in Photoshop, create a duplicate layer, zoom in to 100% and check and remove any sensor spots. I found one or two but again using the content aware tool these are easily and quickly removed. I have to say at this point that Photoshop is far better cleaning a file thnt the clone or heal tool in Lightroom.
Finally I save the image as a High Resolution Tiff file which automatically sits alongside the original file in Lightroom. I like then to live with the result for a few days. Revisit what I have done and fine tune where necessary. It’s all part of my workflow, my creative process. Last but not least I added a ‘split tone’ in Lightroom.
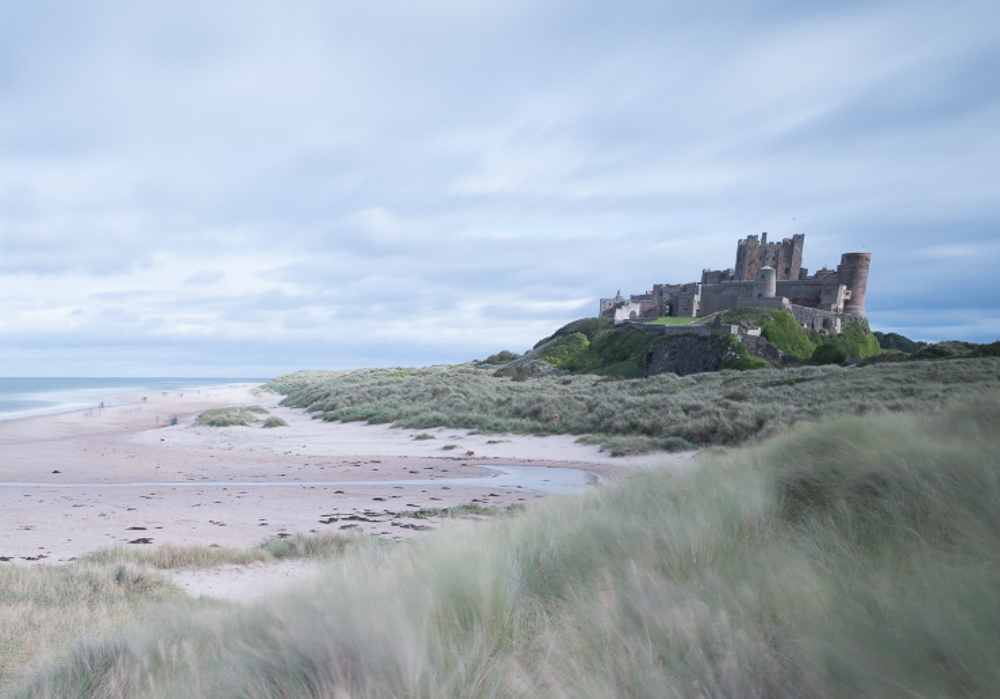
And finally, the finished photograph of Bamburgh Castle.
I am very happy with the result and I hope you have enjoyed this walk through of my workflow. It’s nothing ground breaking but it works for me and I can achieve what I want quite quickly. I don’t like to rush but nor do I have the patience or time to spend hours processing an image. If you have any points you would like to raise or questions you would like to ask, do please use the comments section.

18 Responses to “Bamburgh Castle – the before and the after”
Great post and fabulous work Alan. 🙏
LikeLike
Thanks very much indeed. Glad you enjoyed it.
LikeLiked by 1 person
Actually, I’d like to see a close up shot of those shadowy figures but that’s me for you!
LikeLike
The final result is amazing (but I did like the original colour version too, despite my poor eyesight not picking up things like the castle distortion).
Thanks for sharing your thoughts and processing – I loved seeing the steps you made right to the end image.
LikeLike
Thank you Vicki. My default is always mono but I may well try processing a colour version and compare the results.
LikeLiked by 1 person
Thank you for a very informative post. Love the photos and the progression of each of them.
LikeLike
My pleasure. Thanks for your feedback. Always appreciated.
LikeLiked by 1 person
I’m really enjoying the photo, and enjoyed your admirably clear explanation of the process. The one minor item that was unclear to me was “flatten the image in Photoshop” – does that mean, dial back the amount of contrast a bit? Thanks again for the interesting tour, RPT
LikeLike
Hi Robert. Pleased you enjoyed the image and the expplanation. ‘Flatten the image’ in Photoshop is very simply the merging of all the layers you have created during processing to leave just the one layer or in effect the image which includes all the adjustments you have made. Hope this makes sense.
LikeLiked by 1 person
Yes, thank you!
LikeLiked by 1 person
Thanks for this Alan, always interesting to see another photographers creative process – one question, your 18mm, was it on a Full Frame Camera, thus a supersede or cropped sensor, being still wide but not as wide ?? Regards, Graham
LikeLike
Hi Graham. 18mm on a full frame (35mm) sensor. All the best Alan
LikeLike
Great image Alan, and nice to see your personal workflow, Thank you
LikeLike
Thanks very much.
LikeLike
Great result and the walk-through of the processing is a valuable insight into how you work. Thanks Alan.
LikeLike
Thanks Andy. I do vary my workflow but this I believe was the right approach for this particular image.
LikeLike
I missed this post when it first appeared and found it through your trail. Thank you for making your comments so clear and easy to follow
The description of your processing workflow was most helpful and the end result recalled my memories of a the wildness of the area on a visit to Bamburgh as a child. Thank you , Alan.
LikeLike
Hi Fay. Thanks for your kind comment and I am pleased it bought back happy memories. It was the first time we have visited the area and would love to go back. A special place. Best wishes. Alan.
LikeLike